============
Note - these instructions are written in LEFTISH. If you are right-handed - just reverse the directions.
============
BASICS
THIS IS HOW I DO IT - TIHIDI
General Info
- Press the fabric before you cut it
- You want the cuts to be straight and accurate
- Always use a rotary cutting mat
- Always use acrylic rulers - roll the rotary cutter blade against the edge of the ruler
- Always press down firmly on the rotary cutter
- Always cut AWAY from your body
- Caution - Blades are sharp!! - Safety First!!
Placement of the Rotary Cutting Mat
- Place the rotary cutting mat so that the #1/1 square is in the bottom right hand corner - you want the numbers to run along the bottom from right to left and from bottom to top (unless you are comfortable counting backwards).

First Cut - Straighten the Edge
Method # 1 - Right (Wrong) Hand Cut
- Fold the fabric in half lengthwise
- Line up the fabric with the fold on a grid line on the cutting mat with the raw edge to the right
- Place the ruler on the fabric with the right edge close to the raw edge of the fabric
- Line up the ruler with a vertical grid line and the top of the ruler hooked to the top of the mat - 90 degree angle to the fold
- Hold the ruler with your left hand
- Using your right hand - cut along the right-hand side of the ruler trimming and straightening the raw edge
- ADVANTAGE - trimmed edge is on the right

Method # 2 - Left-Hand Cut
- Same set-up as Method #1 - but instead of using your right hand - go around to the other side of the cutting table and use your left hand to cut along the left-hand side of the ruler trimming and straightening the raw edge
- ADVANTAGE - trimmed edge is on the right

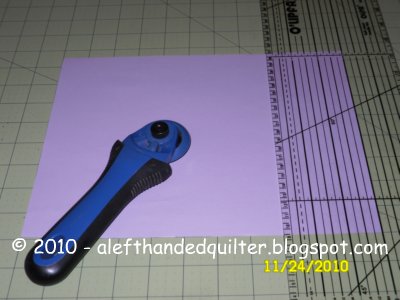
Method # 3 - Left-Hand Cut
(the method used in the Overview - and my favorite method)
- Fold the fabric in half lengthwise
- Line up the fabric with the fold on a grid line on the cutting mat with the raw edge to the right
- Place the ruler on the cutting mat with the left edge just over the raw edge of the fabric
- Line up the ruler with a vertical grid line and the top of the ruler hooked to the top of the mat - 90 degree angle to the fold
- Hold the ruler with your right hand
- Using your left hand - cut along the left-hand side of the ruler trimming and straightening the raw edge
- ADVANTAGE - trimmed edge is on the right

Method #4 - Left-Hand Cut
- Fold the fabric in half lengthwise
- Line up the fabric with the fold on a grid line on the cutting mat with the raw edge to the left
- Place the ruler on the fabric with the left edge close to raw edge of the fabric
- Line up the ruler with a vertical grid line and the top of the ruler hooked to the top of the mat - 90 degree angle to the fold
- Hold the ruler with your right hand
- Using your left hand - cut along the left-hand side of the ruler trimming and straightening the raw edge
- DISADVANTAGE - trimmed edge is on the left - and the trimmed fabric must be turned so the trimmed edge is on the right when you go to make the second cut

Second Cut - Cutting Strips
- Fold the fabric in half lengthwise with the trimmed edge on the right
- Line up the fabric with the fold on a grid line on the cutting mat with the raw edge to the right
- Decide how wide you want the strip to be (3" in the photo below)
- If the strip width is less than the width of the ruler - place the ruler on the fabric with the right edge of the fabric at the width line - the fabric showing under the ruler will be the finished cut strip (3" in the photo below)
- If the strip width is greater than the width of the ruler - use the grid lines on the cutting mat to align the ruler
- Line up the ruler with a vertical grid line and the top of the ruler hooked to the top of the mat - 90 degree angle to the fold
- Hold the ruler with your right hand
- Using your left hand - cut along the left-hand side of the ruler
- Turn the strip and cut off the selvage
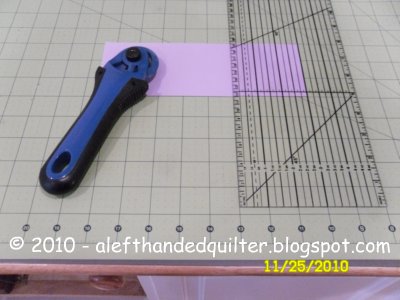
Sub-Cuts - Cutting Patches - Squares & Rectangles
- Press the strips if necessary
- Line up the strip with both a horizontal and vertical grid line on the cutting mat
- Decide how wide you want the patch to be (3" in the photo below)
- Place the ruler on the fabric with the right edge of the fabric at the width line - the fabric showing under the ruler will be the finished cut square or rectangle (3" in the photo below)
- You may also use the cutting mat grid to measure the patch -
Example - If the raw edge starts at the 2" grid line on the mat - you can/may cut 4" rectangles on the 6" - 10" - 14" grid lines - just count 2 + 4 (6) + 4 (10) + 4 (14) - etc. You are NOT counting backwards - just from right to left.
- Line up the ruler with a vertical grid line and the top of the ruler hooked to the top of the mat - 90 degree angle to the fold
- Hold the ruler with your right hand
- Using your left hand - cut along the left-hand side of the ruler
There you have it -
I'm not saying that it is the best way - or the easiest way - it's just The Way I Do It - TWIDI - another new word - sounds like Tweety!
I use all four methods at various times. Sometimes I use the grid on the mat. Sometimes I don't use the grid lines on the mat at all. Sometimes I just use the grid on the ruler. It depends.
Bottom line - I just do what works for me. So I'm making that -
Rule #2 - Do What Works For You!
Talk to you later - gotta go - gotta sew -

1 comment:
Kitty,
I am a flippin lefty too and where have you been all of my life? I just found you today and I'm so excited! I am also a grandmother of four and a retired School Business Administrator. I think you are my new BFF. Love your site and all of your lefty hints.
Gotta go for now and read all of your past posts. Would love to hear from you.
Rose
Post a Comment