Note - these instructions are written in LEFTISH.
If you are right-handed - just reverse the directions.
============
OK - this is next time - ;))
This tutorial is a continuation of Part 1 where I showed/told you -
How To Make A Sudoku Quilt - HERE -
This is How I Make Sashings and Cornerstones and Borders -
STEP 7 - Add sashings and cornerstones -
My blocks measure 5” x 5” when sewn together -
And I want my sashing/cornerstones to be 1/2” wide - finished -

For this you will need -
From Part 1 -
- Sashing strip - 5” x 10” -
- Sashing strip - 5” x 16” -
- Cornerstone strip - 1” x 16” -
- Cornerstone square - 1” x 1” -
- Border fabric - to be determined later - ;))
I used White for my sashings -
Red for my cornerstones -
And Blue for my borders -
So I cut -
White sashing strip - 5” x 10” -
White sashing strip - 5” x 16” -
Red cornerstone strip - 1” x 16” -
Red cornerstone square - 1” x 1” -
I always start with the sashing -
White sashing strip - 5” x 10” -
Cut into nine (9) strips - 1” x 5” -

9 White sashing strips plus one Red cornerstone square - 1” x 1” -

Then I add the cornerstones to the mix -
White sashing strip - 5” x 16” -
Red cornerstone strip - 1” x 16” -
Sew strips together -

Press AWAY from the Red cornerstone fabric -
And cut the sashing/cornerstone combo strip into 15 - 1” strips -
My strips weren't long enough so I cut 9 from one and 6 from another set -


Lay out the blocks - in order -

Sew a plain sashing strip to the RIGHT side of each block -
Press AWAY from the block -
9 blocks - 9 plain sashing strips -


Add a sashing/cornerstone combo strip -
To the BOTTOM of each block -
Press AWAY from the block -
9 blocks - 9 sashing/cornerstone strip combos -

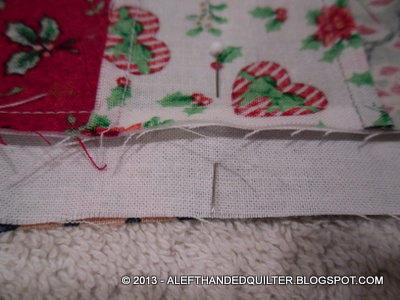
When I sew them together -
I put the sashing/cornerstone combo strip on top -
And feed it through with the cornerstone leading -

And this is a great time to make sure your blocks are the right size -
That bottom edge is RIGHT ON!! - ;))

So far - so good - ;))

All we have to do now is finish the outside edge -

Add a sashing/cornerstone combo strip to the TOP of Block #2 and #3 -
And a sashing/cornerstone combo strip to the LEFT side of Block #4 and #7 -
4 more sashing/cornerstones used -

I left Block #1 for last -
It will use the last 2 sashing/cornerstone combo strips -
And the Red cornerstone square -

I sewed the TOP sashing/cornerstone combo strip on first -
And sewed the red square to the TOP of the LEFT sashing/cornerstone combo strip -
Before adding it to the LEFT side of the block -

Now - do you see what I see? -
I see ANOTHER 9-Patch - ;))

Gee - wonder how I should put that together?? -
Just kidding - ;))
But before I sew these blocks together -
I need to do some re-pressing -
Because I pressed all of the seams AWAY from the blocks -
Some of these blocks will not NEST properly -

BUT -
If I re-press the TOP seam on Block #2 -
And the BOTTOM seams -
On the MIDDLE blocks -
Block #2 and #5 and #8 -
TOWARD the block -
They should nest nicely - ;))

So - the rest is just standard assembly stuff -
Chain piece Block #2 to #1 -
Block #5 to #4 -
Block #8 to #7 -
With the cornerstone leading -
I don’t press yet - ;))


Then chain piece Block #3 to #1/2 -
Block #6 to #4/5 -
Block #9 to #7/8 -

Now I press - ;))
I press to the path of least resistance -
The side sashings on the top and bottom row -
Get pressed AWAY from the block -
The side sashings on the middle row -
Get pressed to the RIGHT -
When I sew the rows -
I flip Row #1 down on top of Row #2 -
So that Row #2 is on the BOTTOM -
With all of the seams going DOWN -
WITH the feed dogs -
And Row #1 is on TOP -
Where the seams can be nested easily -

I don’t “pin” my short rows -
I just put pins in roughly where the sashings meet -
I will “nest” them with my fingers -
When I get to them -

When the rows are together -
Give it a good press -

Mine stretched a bit -
And came out to 16-1/2” square -
Mathematically - it should be 16” square -
So before you cut the borders -
Be sure to measure it - ;))
STEP 8 - Add the borders -
My borders are cut at 3-1/2” wide -
And will finish at 3” -
Making my little Christmas Sudoku Quilt -
Finish at or around 22" square - ;))
I don’t actually “measure” my border lengths -
I do the side borders first -
And lay two border strips out on top of the quilt top -
Matching the top of the strips to the top of the quilt top -
(So - how many times can YOU use the word “top” in three lines? - haha - ;))

Smooth them out -

And cut them even with the bottom of the quilt top -

Sew one to each side -
I DO "pin" my borders when I sew them -
And I pin the corners in BOTH directions -
To help keep them square -

And press them to the border strips -

And then do same thing with the top and bottom borders -
Lay two strips out across the top from side to side -
Match the RIGHT side of the strips to the RIGHT side of the quilt top -

Because I am LEFT-HANDED -
I will cut them even with the LEFT side of the quilt top - ;))

Sew them to the top and the bottom -
Again - pinning to keep those corners square -


With pins at the sashings -

And pins in the middle of the blocks -
Press them to the border -
And -
TA DAH!!

My Christmas Sukoku Quilt center square -
One of each of these fabrics appears in -
Each “Box -
Each “Column” -
And each “Row” -
That's Sudoku - ;))

All I have to do now is -
Layer - baste - and "quilt as desired" -
And who knows when THAT will be - ;))
Talk to you later - gotta go - gotta sew -

4 comments:
Awww that is so cute. I'm going to have to count my Christmas fabric and see if I have 9 different ones. That would be such a good auction quilt for our guild this fall.
Very nice - but I have to admit, I still don't understand Soduko puzzles.... Maybe because I've just never sat and tried one. But I do love this little quilt
Thanks, Katie - I LOVE Sudoku puzzles - but I like logic puzzles and brain teasers and mysteries and all of that stuff anyway. Obviously some puzzles are easier than others but if you start with an "Easy" one - they can be fun. It's basically trying to figure out which "number" is missing in the box - or column - row - based on the ones that are already there - really simple - you should try it - you might like it - ;))
Awww, thanks! - ;)) I think that it would be a good auction quilt for ANY time of the year - I can see a Valentines' Day Sudoku - St. Patrick's Day - Easter - 4th of July - Halloween - Thanksgiving - Spring - Summer - Fall - Winter - hmmmmm - ;))
Post a Comment