If you have been looking for a LEFT-HANDED RULER -
To use to cut HST and QST -
You have found it!! - ;))
I call it -
LEFT-EZE™ Rule -
Because we do!! - LOL - ;))
Check out all of the new pages/tabs across the top of my blog - ;))
===
LEFT-EZE™ Rule -
A LEFT-Triangle - designed for Left-Handed Quilters - ;))

Use ONE RULER
To trim the selvage -
Cut Half-Square Triangles (HST) -
And Quarter-Square Triangles (QST) for Hourglass Blocks -
And Flying Geese units -
And Squares -
Using Pre-cut strips -
LEFT-HANDED!! - ;))
No more "flipping" rulers - OVER - BACK - or SIDEWAYS -
The numbers go in the CORRECT direction -
And are EASY TO READ -
Because -
It's LEFT-HANDED!! - ;))
===
How I use it to Trim the Selvage end of the strips -
For Half-Square Triangles (HST) -
Start with two contrasting strips -
(I used pre-cut 2-1/2" strips for these demos)
And place them right sides together -
Line them up with a horizontal line on your cutting mat - to keep them straight -
TURN the ruler so that you can read - This way for a STRAIGHT cut -
Line it up with a vertical line on your mat -
With the strip between ANY two horizontal lines -
Using the other horizontal lines to keep the ruler straight -
Cut UP the LEFT side of the ruler -
===
How I use it to Cut a Half-Square Triangle -
TURN the ruler so that you can read - This way for a DIAGONAL cut -
Line up the RIGHT side of the ruler along the cut edge of your strips -
With the "black triangle tip" at the TOP RIGHT of the strip -
The bottom of the strips will line up with a line on the ruler depending on its width -
Using the other horizontal lines to keep the ruler straight -
Cut UP the LEFT side of the ruler -
TURN the ruler so that you can read - This way for a STRAIGHT cut -
Line up the RIGHT side of the ruler along the cut edge of your strips -
With the "black triangle tip" at the BOTTOM LEFT of the strip -
The top of the strips will line up with a line on the ruler depending on its width -
Using the other horizontal lines to keep the ruler straight -
Cut UP the LEFT side of the ruler -
Sew them along the LONG/DIAGONAL side - starting at the "flat" end -
Press them open -
Use the diagonal line going from the corner to the center of the long side to trim the dog-ears -
The numbers down the LEFT column will help line up the bottom of the HST -
Does it "measure" 2-1/2" square? -
Yes, it does - ;))
===
Check out the Tutorials - HERE -
The Size Chart - HERE -
The Free Pattern and Tutorial - HERE -
And the Reviews/Testimonials - HERE -
===
ORDERING INFORMATION -
For ordering information regarding my LEFT-EZE™ Rule -
Please go to the "My Store" page/tab at the top of this blog - or HERE - ;))
===
Talk to you later - gotta go - gotta sew -
My groove -
But that's OK -
I know that it's around here somewhere -
And that it'll show up eventually -
If I just keep playing around -
And winding more bobbins - LOL - ;))
Talk to you later - gotta go - gotta sew -
Filled up this space -
And a couple of rows on this side - before I ran out of bobbin thread and called it quits for the day - ;))
It looks OK from the back - but not that wonderful -
So it still needs work -
A LOT of work - ;))
I adjusted the height of the foot (the elastic hair band loops) -
I tried speeding up the machine - and slowing down my hands -
But my stitches got really tiny -
So I don't think that's it -
For some reason my rhythm is off -
And I'm not hearing the "hum" of the machine like I used to -
That sound the machine makes when I'm "in the zone" -
So I still have to play with it -
To figure out what's different from the last time I did some FMQ -
And what I need to change to fix it - ;))
Tomorrow I'll start over -
Wind some more bobbins -
Give it another good cleaning -
Re-thread it -
Re-check my settings -
The whole nine yards -
And then try it again -
It's not like I haven't done it before -
And that I don't know how - LOL - ;))
Talk to you later - gotta go - gotta sew -
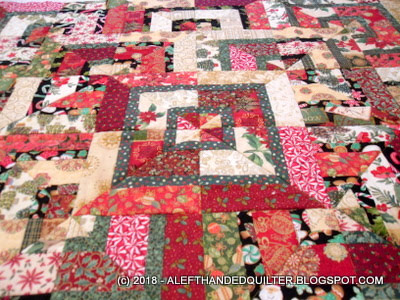
Is definitely needed before I finish quilting this one -
A Christmas top from long ago -
Already basted and quilted "in-the-ditch" - ;))
Before I tackled it -
I pulled out a practice piece -
Tested my settings -
And broke two needles -
While attempting this pathetic looking column of feathers -
The bottom of the "spine" shows all of the stops and starts - while I tried to figure out why the needle kept breaking. Re-threading both top and bottom seemed to fix that. For the feathers - I sewed up the spine alternating left and right - and then came back down putting loops inside the feathers. Then I tried to "echo" the left side going up and the right side coming back down -
Boy - am I out of practice!! - Sheesh!! -
The tension seems to be OK - and the stitch length is semi-even - but my curves need improvement -
The back looks better than the front -
I'll need to practice some more -
Before I play with something pretty - LOL - ;))
Talk to you later - gotta go - gotta sew -
Of projects already bagged up -
And partially done -
Some Red String Blocks - with papers still attached -
Long ago abandoned and ready to find a new purpose -
Some more 2" strips for Upstairs/Downstairs blocks -
And some 9-Patches - partially sewn -
With the EQ diagram of the intended layout -
Some Dresden Plates ready to be appliqued to a background -
With the purple backgrounds yet to be cut - but there - waiting patiently -
And the rest of my Deep Red Crumb Squares -
Crumb blocks are done - sashes and centers are cut -
Some assembly is required - LOL - ;))
Looks like I don't need to "cut and kit" anything new -
When I have a bunch of UFOs sitting around -
Waiting to come out to play - LOL - ;))
Talk to you later - gotta go - gotta sew -
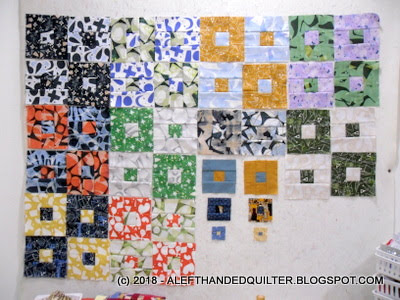
Was all it took to blow some of the blocks off my wall - LOL - ;))
The window is just to the left of the design wall -
And a breeze will do that if I don't pin the blocks to the felt on the wall -
But that's OK -
It's easy enough to put them back up there -
I know where they go -
And I was busy sorting through my 2" die-cut strips looking for the ones long enough to make some more Upstairs/Downstairs blocks for a quilt top that is hanging in the closet and a little too small to be of much use. It needs a BUNCH more blocks - so this will be a good start -
This week I want to get some projects "cut and kitted" before I turn my attention to making backings and then basting some of my quilt tops that need quilting -
I keep saying that I want/need to practice my FMQ -
And the winter months are the perfect time to do that -
But just in case I get bored "quilting" -
I thought it would be nice to have some projects ready to "sew" -
At least that's the plan - LOL - ;))
Talk to you later - gotta go - gotta sew -
For my Jiffy Jelly™ Quilt - HERE - are sewn together -
And I followed Gene's terrific suggestion -
If you ALWAYS use that machine for piecing (and nothing else) - you could put the 4 on a piece of cardstock and always put it UNDER the foot. That way you would have to move it to sew--and when you pick it up - you change the setting.
I do have cardstock - but it's in huge 12" x 12" sheets -
So I used a scrap of "index card" instead -
And I even remembered to put it BACK UNDER the presser foot -
When I was finished sewing for the day -
Now you watch -
THAT'S the part that I'll forget to do - LOL - ;))
Talk to you later - gotta go - gotta sew -
And I spent some quality time together today - ;))
Jack is the name I gave my handy-dandy seam ripper -
He helped me "un-sew" everything I had sewn yesterday -
Because I forgot to change the needle position -
To get my "scant" 1/4" seam allowance - ;))
I have my little sticker to remind me to change the needle position to 4.0 -
But maybe I need something to remind me to LOOK AT THE STICKER -
Before I start to sew - LOL - ;))
Anyway - this time I actually LOOKED at the sticker on my machine -
Changed the setting -
And resewed the ones I had sewn yesterday -
I should have known something was wrong when my center rows of three squares weren't matching up to the side rectangles - but it didn't "register" - oh,well - ;))
Hopefully - I will pay attention to that little sticker when I do this next batch -
Or Jack and I will have another play date - LOL - ;))
Talk to you later - gotta go - gotta sew -
Yesterday - while I was waiting for company to arrive -
I sewed parts of several more sets -
For my Jiffy Jelly™ Quilt - HERE -
And then I realized that I forgot to change the needle position -
To get my 1/4" seam allowance -
So today -
The day after enjoying all of that wonderful company, laughter, and food -
Today - I'll be "un-sewing" -
And then "re-sewing" -
Everything that I sewed -
Yesterday - while I was waiting for company to arrive - LOL - ;))
Talk to you later - gotta go - gotta sew -
Happy Thanksgiving!! - ;))
Today is Turkey Day in the U.S.A. -
And a day to Give Thanks! -
And I DO! - ;))
I'm thankful for SO many things -
My family - my friends - my neighbors - my readers/followers/fans -
My stash - my sewing machines - my toys -
And SO much more! - ;))
Here's hoping that you have a very nice Turkey Day with your family! -
And have plenty of leftovers! - ;))
Talk to you later - gotta go - gotta sew -
Is sewn together -
And part of another -
Compared to the 1-1/2" and 1" strips that I used for the "mini test" blocks -
These 2-1/2" strips look HUUUUUGE - LOL - ;))
So that's probably about all the sewing I'll get done for the next couple of days -
Company's coming -
Can't wait to start "visiting" -
And fixing the food -
Oh, the food -
The turkey's not the only one around here -
Who will be "stuffed" - LOL - ;))
Talk to you later - gotta go - gotta sew -
After doing some more chores to get ready for the holiday - ;))
I cut the second roll of strips for my Jiffy Jelly™ Quilt - HERE -
And piled them up on the cookie sheet -
Second verse - same as the first* -
All ten sets of four - ready to go -
If/when I can find time in the next few days to play with them - ;))
Talk to you later - gotta go - gotta sew -
*Brownie points to those of you who recognize the reference - without having to google it - LOL - ;))
For my Jiffy Jelly™ Quilt - HERE -
I pulled out the second roll of strips -
As you can see - these strips are NOT "pinked" -
I have heard it said that Moda the fabric companies "pink" the edges to keep them from raveling - but that doesn't make sense to me - because - in my opinion - the "pinked" ones ravel more than the STRAIGHT cut ones do - and I have lost as much as 1/4" on some of those "pinked" points -
First of all -
If they wanted to prevent raveling - they could wrap them in cellophane like these - or "shrink wrap" them - they don't HAVE TO "pink" them -
Second of all -
IF preventing raveling was a valid reason - why do we quilters cut all of our seams STRAIGHT? Why don't we all put "pinking" blades in our rotary cutters and "pink" our cut pieces (strips/squares/rectangle/triangles) to prevent them from raveling? -
We don't because "pinking" might make sense in garment sewing where they want to "grade" the seams - but it makes no sense in quilting - since we use 1/4" seams - not 5/8" - and we don't "grade" them - ;))
BOB doesn't know for sure - but thinks it might have to with being able to cut more strips from a piece of yardage - if some of the strips "share" a 1/4" edge - they might be able to cut an extra strip or two per yard - and that converts to more $$$ - and we all know it's all about the $$$ - but then again - I could be wrong - LOL - ;))
Getting down off my soapbox for now -
As I promise NOT to buy ANYTHING with PINKED edges - EVER AGAIN -
After that last "Kaffe" layer cake with its "pinked" edges came up short -
If I want/need anything - I'll buy the ones with STRAIGHT cut edges - thankyouverymuch - ;))
Anyway -
After more chores preparing for company and Thanksgiving dinner -
I decided to pair up the second set of strips the same way I paired up the first set -
I think it will look more cohesive if some of them match -
We'll see how that works out - LOL - ;))
Talk to you later - gotta go - gotta sew -
Yesterday - my friend - Gene - left a comment -
I am thinking you could use "four of those made from 1 1/2 inch strips" to make one as large as the 2 1/2" ones (early morning math - don't take it as accurate) OR add more strips around one of the smaller ones to up-size it to fit with the larger ones.
(just in case you needed to play with some more squirrels! LOL)
And you KNOW I had to try it - LOL - ;))
His "early morning math" was correct -
So after my chores - I made two more little blocks from 1-1/2" strips -
I didn't sew them all together -
But they would look cute in a scrappy quilt with different sizes of blocks -
Another terrific use of scraps and strips -
Not that any of us have scraps or strips lying around -
But if we did - LOL - ;))
===
Helen-Mary -
You are a "Google+" and "no-reply commenter" - so I can't get to your email -
I'm glad you like the pattern - but I wasn't the first to post about it -
I like to give credit where credit is due - and said in this post that -I first saw the pattern mentioned on Alamosa Quilter - HERE -
Then followed the links to the FREE Pattern by Moda - HERE -
I like the part where the pattern uses up most of the strip -
===
By the way -
If any of you "Google+" users know how I can "get to" your email -
Would you please let me know -
I still haven't figured out how to do that -
It's like I can get to your "Google+" page -
But I can't find the link to your email address -
And it "dead-ends" there -
Any suggestions?? -
Thanks - ;))
Talk to you later - gotta go - gotta sew -
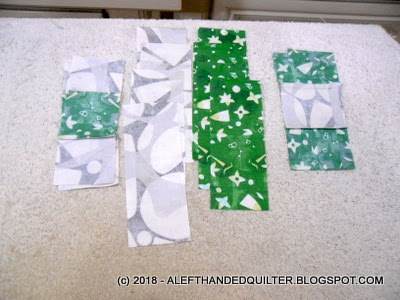
To see what this block would look like in other sizes -
So I cut some pieces from 2" strips - instead of 2-1/2" -
Arranged them like so -
And sewed them together -
Up close - they look a little smaller, of course -
But from back here - they look A LOT smaller - ;))
So then I tried some 1-1/2" strips and 1" strips - just for fun -
They look a bit smaller than the 2" ones -
And A LOT smaller than the 2-1/2" ones - LOL - ;))
In case your wondering about the MATH -
Don't worry - I did some for you - LOL - ;))
===
You can use a variety of squares for the centers -
But you will need to "match" two squares and two rectangles to make the "outer ring" of the block -
I cut TWO different strips at a time - in each size - for TWO different blocks -
So I could swap out the "centers" as I went along -
You will need THREE squares the same size as the strip -
ONE for the center - TWO "matching" ones for the middles -
And TWO "matching" rectangles the same size as all THREE squares added together MINUS one inch - the seam allowances will eat up ONE whole inch of fabric when you sew the three squares together - and the rectangle has to be the same length as the three sewn-together squares -
My 2" strips were 16"+ long -
And I cut 3 squares @ 2" and 2 rectangles @ 5"
2 + 2 + 2 + 5 + 5 = 16
My 1-1/2" strips were 11-1/2"+ long -
And I cut 3 squares @ 1-1/2" and 2 rectangles @ 3-1/2"
1-1/2 + 1-1/2 + 1-1/2 + 3-1/2 + 3-1/2 = 11-1/2
My 1" strips were 7"+ long -
And I cut 3 squares @ 1" and 2 rectangles @ 2"
1 + 1 + 1 + 2 + 2 = 7
===
You could probably "up-size" these, too -
I didn't make them - but I did the MATH - if you want to try some -
And you might want to add a little to the length for trimming -
3" strip - you'll need 25"+ -
Cut 3 squares @ 3" and 2 rectangles @ 8"
3 + 3 + 3 + 8 + 8 = 25"
3-1/2" strip - you'll need 29-1/2"+ -
Cut 3 squares @ 3-1/2" and 2 rectangles @ 9-1/2"
3-1/2 + 3-1/2 + 3-1/2 + 9-1/2 + 9-1/2 = 29-1/2"
4" strip - you'll need 34"+ -
Cut 3 squares @ 4" and 2 rectangles @ 11"
4 + 4 + 4 + 11 + 11 = 34"
4-1/2" strip - you'll need 38-1/2"+ -
Cut 3 squares @ 4-1/2" and 2 rectangles @ 12-1/2"
4-1/2 + 4-1/2 + 4-1/2 + 12-1/2 + 12-1/2 = 38-1/2"
That's almost the entire width of fabric (WOF) so I stopped there - ;))
===
Anyway - that's what I came up with if you want to cut ALL of the pieces for ONE block from ONE strip - then mix up the centers -
And if you want to cut the "centers" from scraps -
You can always subtract one "square" from the list of pieces to cut from a strip -
OR cut the pieces from "matching" strips if you only have short strips -
OR you can always double the length of the strip and cut TWO blocks at a time -
Soooooooo many possibilities -
Remember - Rule #2 -
Do What Works For You! - LOL - ;))
Talk to you later - gotta go - gotta sew -