Monday, January 31, 2022

Another lazy day -


With no sewing - 
 
So I'll show you a photo of some stuff - 

That's still on my "to do" list - 


These projects still need sorting - finishing - etc. - 

One of these days - ;))


Talk to you later - gotta go - gotta sew - 


Sunday, January 30, 2022

Lazy day -


With no sewing - 
 
So I found a couple of puzzle photos to share - 
 
We finished this one a while back - 

I like the circular ones -


Maybe I'll do some sewing tomorrow - 

Maybe not - LOL - ;))


Talk to you later - gotta go - gotta sew - 


Saturday, January 29, 2022

Another experiment -


Was on the agenda today - 
 
To see if I could make a 6-1/2" version - 
 
Of the Square-in-a-Square unit - 
 
In a "different" way - 
 
And this one came out just right - 
 
 
My "different" way - 
 
Was to see if I could make the center square using my LEFT-EZE™ Rule
 
So yesterday I tried cutting the center square as a folded QST - 
 
But the whole "unit" came out a little too big -
 
And the strip size needed to cut it properly is an odd size -  

And not worth the time and/or trouble -
 
So today I cut the center square as a "regular" 4-3/4" square - 
 
And the experiment worked -
 
And it's not "different" at all - 

It's just the "regular" center square and corner HST way - LOL - 

After cutting the center square - 
 
I can use either my LEFT-EZE™ Rule
 
Or one of my dies for the corner HSTs - 
 
And the larger "version" of my Antique Squirrel
 
Could/would use 2-1/2" jelly roll strips for the bar units -
 
And no - I didn't plan on adding bigger blocks to the quilt -
 
I was going to make a larger version all by itself - 
 
And didn't think to combine them in one top - 
 
Until Gene mentioned it - 
 
It's not a bad idea -
 
I'm just not "there" yet - LOL -;))


Talk to you later - gotta go - gotta sew - 


Friday, January 28, 2022

An experiment -


Was on the agenda today - 
 
To see if I could make a 6-1/2" version - 
 
Of the Square-in-a-Square unit - 
 
In a "different" way - 
 
But it came out a bit too big - 


So - 
 
Back to the drawing board - LOL - ;))


Talk to you later - gotta go - gotta sew - 
 

Thursday, January 27, 2022

Antique Squirrel - Test Block -


A few day ago - 
 
I mentioned that I could think of a couple of ways to assemble this block -  


Since it is basically a 9-patch - 

The easiest way would be to sew three rows of three units - 

Then sew the rows together - 

The TOP row has the "bar" unit seams pressed to the LEFT - 

 
And there are no seams to match on this side - 
 
 
Or on this side - 
 
 
The MIDDLE row has the "bar" unit seams on the LEFT pressed DOWN -
 
 
And the "bar" unit seams on the RIGHT pressed UP - 
 
Again - with no seams to match on either side - 
 
 
The BOTTOM row has the "bar" unit seams pressed to the RIGHT - 
 
With no seams to match on this side - 

 
Or this side - 


Three suggestions - 
 
#1 -
When you sew the rows together - 
 Sew the units together with the "Square" unit facing UP - 
 So that you can see the "POINT" when you sew over it - LOL - 
 
#2 -
Press the first/third rows AWAY from the "Square" units - TOWARD the BAR unit -
And the middle row AWAY from the CENTER unit -  TOWARD the BAR units - 

#3 -
Stitch the rows together - 
Press the top and bottom rows AWAY from the MIDDLE row - 

That way - two "middles" will be pressed "IN" - 
And two "middles" will be pressed "OUT" - 
Making it easy to nest the seams from block to block - 
Simply by rotating one a quarter turn - 
 
Another way to assemble the block - 
Would be to sew four "combos" - 
 
One "Square-on-point" or "Square-in-a-Square" unit to a BAR unit - 
With the seams of the BAR unit pressed DOWN - 
 
Then arrange the four around a center "Square" unit - 
And sew them together using partial seams - 
 
 
That might be an option if you don't mind partial seams - 

Or if you want to "match" a "Square" unit to a BAR unit as you go along - 

Personally - 

I would probably just make 9-patches - 
 
And sew them together the "easy" way - 

But it is nice - 

To have options - LOL - ;))
==
 
That was what I had "scheduled" for today's post - 
 
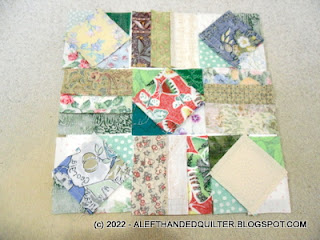
But then I made a "Test Block" - 
 
And most of that went right out the window - LOL -;))
 
The "pressing plan" didn't work - 
 
And the idea of using partial seams seemed unrealistic - 
 
SO - 
 
ERASE - ERASE - LOL - ;))
 
I went back to the "drawing board" - 
 
And made 4 new "Square-in-a-Square" units - 
 
With NEUTRAL centers -
 
To add to the one I "stole" from the first batch that I made - 
 
Then I "stole" 4 of the "BAR" units, too - 
 
And laid them all out on the ironing board -  
 
 
I decided to press the BAR units - 
 
In the TOP and BOTTOM rows - 
 
TOWARD the CENTER of the patch - 

 
And the BAR units in the MIDDLE row -
 
AWAY from the CENTER of the patch - 


BOTTOM row - same pressing as the TOP row - 
 
TOWARD the CENTER of the patch - 
 
 
Sewed the units together in each row - 
 
The sewing/pressing suggestions from above still apply - 
 
#1 -
When you sew the rows together - 
 Sew the units together with the "Square" unit facing UP - 
 So that you can see the "POINT" when you sew over it - LOL -


#2 -
Press the first/third rows AWAY from the "Square" units - TOWARD the BAR unit -
And the middle row AWAY from the CENTER unit -  TOWARD the BAR units - 


And - YES - I saw the wonky top seam in the BAR unit on the right - 
And I fixed it before I sewed the rows together - LOL - 


#3 -
Stitch the rows together - 
Press the top and bottom rows AWAY from the MIDDLE row - 

That way - two "middles" will be pressed "IN" - 
And two "middles" will be pressed "OUT" - 
Making it easy to nest the seams from block to block - 
Simply by rotating one a quarter turn - 


Some of the "points" don't seem to want to go the way I want them to - 
But I don't think it's worth fighting them - 
So I'll let them go whichever way they want to go - 
As long as the "outside" edges nest with the seams in the next block -
They should be fine -


Some things worked out "in real life" - 
 
The way they worked in my head - 
 
Some things did not - 
 
And THAT'S why - 

I like to make a TEST BLOCK - LOL - ;)) 

I think the NEUTRAL center squares in this version will work nicely - 

And I kinda like the NEUTRALS that show up in the CORNERS - 

And the BARS, too - 

So - once I cut the center squares from my NEUTRAL scraps - 

The rest can be "kitchen sink" - 

And it should be just fine - LOL - ;))


Talk to you later - gotta go - gotta sew - 


Wednesday, January 26, 2022

Some sorting -


Of the "center squares" that have already been cut - 
 
For my Antique Squirrel
 
Found these "neutrals" - 


I'm not sure about the GOLD in the lower right corner - 
 
It might be a bit too dark - 

But if I cut more from squares from my "neutral" scraps - 

I could do Version A - 


AND still keep it "scrappy" - ;))


Talk to you later - gotta go - gotta sew - 


Tuesday, January 25, 2022

Antique Squirrel - Version A -


Version A seems to be the favorite - 
 
 
And I tend to agree -
 
It would work well - 
 
If I used my die and some neutral yardage -

Or if I made all of the "squares" ANY "constant" color -
 
The rest of the scraps could be "kitchen sink" - 
 
The "neutral/constant" would "contain" the jumble of colors - 
 
And give the eye a place to "rest" -
 
And I wouldn't have to worry about - 
 
Which scraps I used for the corners - 
 
OR the bars - 
 
It wouldn't be like the original -
 
But it also wouldn't give me a headache - LOL - ;))


Talk to you later - gotta go - gotta sew - 


Monday, January 24, 2022

Antique Squirrel - 3 ways -


Just for fun - 
 
I played with some versions of my Antique Squirrel - 
 
In EQ - 
 
And colored a layout three different ways - 
 
Version A - 
 
The "Center Square" in "neutrals" - 
 
Version B - 
 
The "Corners" in "neutrals" - 

 
Version C - 
 
A combination of Version A and B - 
 
Alternating both blocks - 

 
I like all three versions - 
 
And am leaning toward Version C - 
 
Which one is YOUR favorite? - 
 
And why? - ;))


Talk to you later - gotta go - gotta sew - 


Sunday, January 23, 2022

Antique Squirrel - Unit B -


The second unit needed for my Antique Squirrel
 
Is a three-strip "bar" or "Rail Fence" unit -
 
The strips are cut at 1-1/2" wide - 
 
By whatever length of scrap you have - 
 
But the scrap should be at least 3-1/2" long - ;))
 
===
 
I cut a bunch of 1-1/2" strips - 
 
And laid them out on my ironing board - 
 
Roughly by the length of the strip - 
 
 
Then I chose three strips of roughly the same length - 
 
And sewed them together - 
 
Pressed the seams in one direction -

 
Took them to the cutting mat - 
 
And laid them out so that I could cut "with" the seams - 
 
Sometimes I cut with the seams showing - 
 
So that I am sure to cut in the same direction - 
 
Anyway - 
 
Sub-cut the strip sets into 3-1/2" segments -  

And save the scraps for another project - 

Un-sewing any strip longer than 3-1/2" - 
 
And adding it back into the mix -

 
I cut several strip sets - 
 
And chose four at random - 
 
For the "middles" - 
 
And laid out a "kitchen sink" block - LOL - 
 
I have NOT sewn the block together yet - 

 
If you flip the "Units" over - 
 
You can see that there are no seams to match from one unit to the next -

 
You will have to match the seams BETWEEN the units - 
 
But that's it - 
 
And if you turn the "bar" Unit B - 
 
So that the TOP one has the seams going to the LEFT - 

 
The one on the LEFT has the seams going DOWN - 

 
The one on the BOTTOM has the seams going to the RIGHT - 

 
And the one on the RIGHT has the seams going UP - 

 
All of the "bar" Unit Bs will have the seams going around in a circle - 
 
Counter-clockwise - 
 
Making it easy to nest the seams from block to block -  
 
Because the seams on the TOP block will be going UP - 
 
And the seams on the BOTTOM block will be going DOWN - 
 
As the two blocks go under the needle - 

 
The corners of each block will not nest - 
 
Unless you want to get fancy with the pressing - 
 
And may get a bit bulky - 
 
But I don't really want to mess with getting fancy - 
 
So I'll leave those alone - 

 
I can think of a couple of different ways to assemble this block - 
 
And will share those - 
 
When I get there - LOL - 
 
Right now - 
 
I want to experiment with a "controlled" version of this block - 
 
I know that the original was the "kitchen sink" variety - 
 
But I think that their scrap stash may have been somewhat limited - 
 
Mine is not - 
 
I have LOTS of scraps - 
 
In all colors - 
 
So - 
 
The question is - 
 
Do I want it to look like a jumbled mess - 
 
Or do I want to limit my color palette? - 
 
I'm leaning toward limiting the colors - 
 
A jumbled mess might give me a headache - LOL - ;))


Talk to you later - gotta go - gotta sew - 


Saturday, January 22, 2022

Antique Squirrel - Unit A - continued -


Today I was able to sew - 

A few more of these guys - 
 
I chose center squares and HST at random - 
 
Laid them out - 
 
And realized that I needed a fifth one - LOL -

 
I used the one that I had already made - 
 
As the center unit - 
 
And made four more -
 
For the CORNERS of the BLOCK - 
 
 
One corner of the Unit A on the BOTTOM LEFT - 
 
And on the BOTTOM RIGHT -
 
Looks a bit light on the WHITE board - 
 
Those corners are WHITE with little PINK polka dots - 
 
From a project that I made years ago -  
 
Some scraps seem to live on f.o.r.e.v.e.r. - LOL - 
 
 
Tomorrow I'll show you how I  make Unit B - 
 
Those units will fill in the "middles" of the block - 
 
And are even easier to make than this one -  ;))


Talk to you later - gotta go- gotta sew - 


Friday, January 21, 2022

Same -


As yesterday - LOL -
 
 
I got no cutting or sewing done today - 

But I did do some paperwork "chores" - 
 
So maybe tomorrow I can SEW!! - ;))


Talk to you later - gotta go - gotta sew - 


LinkWithin

Related Posts Plugin for WordPress, Blogger...