DESIGN WALL MONDAY -
Check out all of us who link up with Judy L. -
At Patchwork Times on Mondays.
We have some awesome stuff on our walls!
Well, THEY do - ME - not so much sometimes - ;))
===
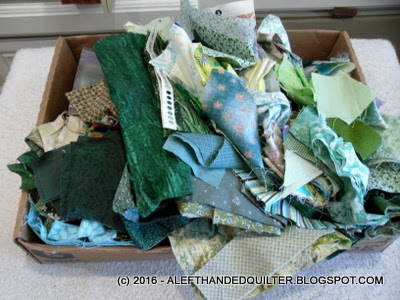
On my wall today -

And some more waiting to be sewn -
I have a pile of quilts to quilt and really need to get back to practicing my Free-Motion Quilting - but I keep seeing "Squirrels" and getting distracted -
And I'm sorting my SCRAPS - again -
They always seem to need sorting -
Why is that? - ;))
I did a post a couple of years ago - LHQ - Scrap Management - HERE -
But I've changed the way I sort my SCRAPS through the years -
Now I consider a SCRAP to be anything smaller than a FAT QUARTER or REGULAR/LINEAR 1/4 yard -
And I sort them by COLOR first -
THEN by SIZE/SHAPE -
I started sorting by COLOR first because it's pretty much a no-brainer -
I throw my scraps into some plastic drawers that I put under my dining room table -
Six plastic drawers - Six colors - one drawer for each color -
Red - Orange - Yellow - Blue - Green - Purple -
But eventually - I need to sort the COLORS by SIZE/SHAPE -
SELVAGES - STRINGS - SQUARES - TRIANGLES - CHUNKS - CRUMBS -
That part is FUN - and the categories are VERY loosely defined -
The difference - to me - between a CHUNK and a CRUMB -
Is the difference between BIG and SMALL -
And that depends on my mood on any particular day - ;))
I keep my NEUTRALS separate and sort them - muslin - light/cream backgrounds - medium/tan backgrounds -
I also like to keep my BATIK scraps separate because they are usually a much denser weave than ordinary cotton -
But I toss my CHRISTMAS fabric scraps in with the other reds/greens/neutrals - ;))
I'm curious - how do you sort your scraps? - ;))
Do you sort by COLOR first - then SIZE? -
OR -
Do you sort by SIZE first - then COLOR? -
Do you include BATIKS - or sort them separately? -
Do you separate out any particular THEME - Patriotic - Christmas - Civil War? -
Any or all of the above? -
Let me know in the comments below -
I'm curious - ;))
It seems like no matter which way I sort them - they get out of control - and I can never find what I'm looking for. I've tried Bonnie Hunter's Scrap User's System - but because I don't use strips and the "specialty" rulers - it doesn't really work for me. I can never seem to get a good "cut" with those rulers so I wind up using my June Tailor Short-Cut slotted ruler and 10" squares or fat quarters or yardage.
I sometimes forget that I have an Accuquilt GO! and various dies that I can use - so I think I want/need to go through my scraps and cut them into the sizes that I need to make some of those scrap quilts that keep dancing around in my head - ;))
That might work - ;))
Talk to you later - gotta go - gotta sew -
As promised - this time I'll show you how I made the CORNER UNITS -
Without a pattern - ;))
I know a lot of quilters are afraid of MATH -
So I'll try to simplify it -
And just DRAW you a bunch of pictures - ;))
First I sewed all of the inner GREEN borders to the outer PINK borders -
The ones that I cut last time -
And attached the two SIDE borders to the quilt top -
One on the LEFT side and one on the RIGHT side -
And then I set the quilt top and the remaining borders aside -
Until I made the CORNER UNITS -
I had pressed all of the borders AWAY from the center of the quilt top - it was the path of least resistance considering all of the seams in the center blocks -
In each of the corners - I wanted to extend the GREEN inner border to the outside - so I colored those in my diagram -
And then re-drew the TOP and BOTTOM borders again at the bottom - so I could concentrate on them and show you what I did without the distraction of all of the stuff in the middle -
Since the center sections of the TOP and BOTTOM borders are pressed AWAY from the center of the quilt - the CORNER UNITS should be pressed TOWARD the center - to allow the seams to nest properly - so I added some more arrows -
And I know that I want a PINK square in the corner - so I colored that in -
But - which way to press the seam between the CORNER UNIT and the center border section? -
Back to the main diagram - if the SIDE borders are pressed AWAY from the center of the quilt top -
Press it in the OTHER direction - TOWARD the center of the quilt -
So I added those little arrows -
Which meant that the other GREEN piece needs to be pressed TOWARD the PINK corner square - so I added those arrows, too -
EDIT UPDATE - When the corner unit is added to the center border piece - the whole seam will be pressed toward the center - so ignore those arrows -
That all looks really complicated - so I re-drew the corners again over to the side - with just the PINK corner square and the first GREEN side to be attached - and the arrows -
EDIT UPDATE - Ignore the arrows -
Looks like I need four PINK corner squares with a GREEN strip sewn to the TOP of each square - pressed TOWARD the PINK -
EDIT UPDATE - The arrows point the wrong way - Press AWAY from the PINK -
From there - I just copied what I had done before -
Two of the PINK/GREEN units need a GREEN strip added to the LEFT side -
And pressed TOWARD the GREEN -
The other two PINK/GREEN units need a GREEN strip added to the RIGHT side -
And pressed TOWARD the GREEN -
SOOOOOOOOOO -
What size do all of these "units" need to be cut?? -
The PINK squares need to be cut 4-1/2" square because that's the width that I decided to use for the outer border (2 squares times 2" per square = 4" PLUS 1/2" seam allowance) - and I have two leftover pieces from the TOP/BOTTOM borders that are already 4-1/2" wide (and over 9" long) - so just cut 4 squares @ 4-1/2" -
And the GREEN strips are already the correct size WIDTH-wise - because I'm using leftover pieces from the TOP/BOTTOM borders for those, too -
The LENGTH of the GREEN strips that I have to add to the TOP of each PINK square has to be the same as the size of the PINK square - so 4-1/2" LONG - and I need 4 of those -
The other GREEN strips that will be added to the sides of the corner PINK/GREEN units need to measure the same as the side that they will be attached to - in this case -
OH, CRAP - now I have to do some MATH -
Just kidding - ;))
All you have to do is sew together the PINK/GREEN unit and measure the long side - the side that you're going to sew to the second GREEN strip - and cut 4 GREEN strips that length -
Mathematically - mine should come to 4-1/2" (PINK-CUT) + 2" (GREEN-CUT) MINUS the 1/2" seam allowance that got eaten up when I sewed the two pieces together - so 6-1/2" MINUS 1/2" = 6" - or whatever other size I decided to use.
NOTE - If you have been following along - and actually DOING the MATH - you know that I would have been short if my WOF wasn't a full 42" - but I lucked out because it WAS - and even then I BARELY made it. But I DID the MATH ahead of time because I wasn't sure. Unless you KNOW that you have enough fabric - and not a limited amount like I had - ya GOTTA DO THE MATH - BEFORE you start cutting - or you run the risk of coming up short - ;))
After that - the rest is simple -
Assemble the CORNER UNITS - like I explained above -
Sew one to each end of the TOP and BOTTOM borders - following the diagram - so that they are pressed/oriented correctly to make matching the seams easier -
Attach the TOP border to the TOP of the quilt top -
Attach the BOTTOM border to the BOTTOM of the quilt top -
And you're DONE! - ;))
Quilting without a pattern is SO liberating!! -
Like I told one of my readers -
I love being able to quilt without a "pattern". It has several advantages. It allows me to "make it my own" - so I'm not tied to something designed by someone else. And I don't have to "wait for" or "find" a pattern - if I can sketch it - I can probably make it. (How do you suppose "designers" come up with their designs and "patterns"?) - AND with graph paper - you don't even need a computer or EQ7 to figure it out - easy peasy - ;))
Try it - you might like it - ;))
Talk to you later - gotta go - gotta sew -
The borders are on my version of Peggy Martin's Pinwheel Polka pattern (from her Craftsy class) - finally -
Although I used Peggy's layout for the blocks - I didn't use her pattern for the borders. I wanted to make mine differently - and as you can see - I decided to go with the GREEN inner border and the PINK outer border. The top border isn't really that wavy - I wanted to show it lengthwise instead of sideways - and it was too high to reach over the table to smooth it out properly - ;))
I had a couple of yards of the PINK - so I wasn't worried about having enough of that - but I wasn't sure if I had enough of the GREEN for the inner border that I wanted. I had a regular/linear quarter yard - 9" x WOF - so I had to do some sketching before I actually cut it - just in case - ;))
And I had to do some MATH - that dreaded four-letter word -
But MATH is just "counting" - so it's not that scary - honest - ;))
I remember when I was a kid and my Dad - who was a GREAT cook - taught me (and my sister) how to cook. I complained that I couldn't cook - I didn't know how. He said, "Can you READ?" When I replied, "Yes." - he said, "All you have to do is read a recipe - and do what it tells you to do." Oh - OK - I can do that - and if that's all there is to it - no problem - ;))
And if I can cook because I can READ -
I can quilt because I can COUNT - ;))
Some of you may remember the line from the Mel Brooks movie Blazing Saddles -
"Badges? - We don't need no stinkin' badges." -
Well - it's the same with these borders -
"Pattern? - I don't need no stinkin' pattern." - ;))
Quilting without a pattern is like cooking without a recipe -
With a little experience - you can make it up as you go along -
All I need is some graph paper - a couple of pencils - and a little ruler to draw myself a picture - ;))
"Old school" quilters do this all the time -
But for any new quilters out there who may want to know -
This Is How I Did It - ;))
===
BASIC QUILT DRAFTING - BORDERS -
The "secret" is to use GRAPH PAPER -
It's cheaper than a pattern - and only requires simple counting - ;))
First I drew a grid -
I used one square for every 2" of block/border -
3 squares by 3 squares = 6" block -
12 squares across by 18 squares down = 4 blocks across by 6 blocks down
Inner/center part - without borders - measures 24" x 36" - FINISHED -
NOTE - SEAM ALLOWANCES (1/2") need to be added before cutting -
===
SIDE BORDERS -
Normally the side borders are added first -
If I want a 2" GREEN inner border (one square) - I need to cut it 2-1/2" WIDE -
The LENGTH would be (COUNT the squares) - 18 times 2 = 36 PLUS 1/2" seam allowance - remember each square represents 2" -
So I need to cut two GREEN strips 2-1/2" x 36-1/2" -
One for the LEFT side and one for the RIGHT side -
===
TOP/BOTTOM BORDERS -
Because I'm making the corners separately -
The top/bottom borders are COUNTED the same way as the side borders -
If I want a 2" GREEN inner border (one square) - I need to cut it 2-1/2" WIDE -
The LENGTH would be (COUNT the squares) - 12 times 2 = 24 PLUS 1/2" seam allowance - remember each square represents 2" -
I need to cut two GREEN strips 2-1/2" x 24-1/2" -
One for the TOP and one for the BOTTOM -
===
INNER BORDERS NEEDED -
Left side - CUT 2-1/2" x 36-1/2"
Right side - CUT 2-1/2" x 36-1/2"
Top - CUT 2-1/2" x 24-1/2"
Bottom - CUT 2-1/2" x 24-1/2"
===
PROBLEM -
I don't have enough GREEN to cut 4 strips @ 2-1/2" wide -
I would need 10" of fabric and I only have 9" -
so I'll be short - before I even consider cutting the corner units -
===
So - on to Plan B -
Bottom line - for the inner borders - I need to cut four strips - two @ 36-1/2" long and two @ 24-1/2" long - and those are shorter than the width of the fabric (WOF) - so I don't need to piece them. And I should have enough left over from the shorter strips to use for the corner units.
All I need is four strips the same width and I'm good.
Probably could/should have started with Plan B - but then I couldn't show you how to "adapt" - ;))
My GREEN regular/linear quarter yard is 9" wide x WOF - so the MAX width that I can CUT is 2-1/4" - to finish at 1-3/4" - which is a perfectly good number - but -
To simplify the MATH - let's go with a 2" wide CUT border - to finish at 1-1/2" - ;))
It's easy enough to CUT 4 strips @ 2" - that comes to 8" - leaving a "string" for something else - ;))
My quilt top came out to exactly what it should have been mathematically - but if it hadn't - I would have adjusted the subcut lengths to the "actual" lengths needed - so be sure to MEASURE before you cut - ;))
GREEN - CUT 4 strips @ 2" x WOF - (Need 8" of fabric x WOF)
subcut 2 to 36-1/2" for the sides (or actual length)
subcut 2 to 24-1/2" for the top/bottom (or actual length)
PINK - CUT 4 strips @ 4-1/2" x WOF - (Need 18" of fabric x WOF)
subcut 2 to 36-1/2" for the sides (or actual length)
subcut 2 to 24-1/2" for the top/bottom (or actual length)
Save the leftovers from the shorter strips for the corner units -
Next time - I'll show you how I did those -
Without a pattern - ;))
Talk to you later - gotta go - gotta sew -
My version of Peggy Martin's Pinwheel Polka pattern (from her Craftsy class) is still marinating on the wall - and I don't think that I want to spend the time it takes to make a crumby border. Besides, those crumbs are really pretty and could be used in something else entirely - to add a bit of pink/green/white - and make that something else really pretty, too. Why use them all up on one quilt - why not spread them around a little? - ;))
SO - I checked my stash and found a pretty pink batik that could be enough for the inner border - and a pretty pink with white polka dots that I could use for the outer border - but the pink batik and pink with white polka dot don't go together -
Then I found another green that was pretty close to the other two that I used (the crumbs are all that I have left of the other two) - so maybe a green inner border with the pink with white polka dot outer border - or a white with pink polka dot inner border with the pink with white polka dot outer border -
I can't decide -
That's why it's still marinating - ;))
Any thoughts? - ;))
Talk to you later - gotta go - gotta sew -
So I played with trying to make a crumby border for the Pinwheel Polka - and I'm not sure that I like it. I think it might be a little distracting and may just go with a plain outer border and put the crumby piece on the back. Until I decide - I'm going to let it "marinate" on the design wall for a while - ;))
Then I made the scrap card for my scrapbook - and got bored with the pink/green -
So I decided to play with the Amish Cheater Panel Pillowtop for a bit -
Centered it and layered it with a fusible batting and a black backing - then because the center/pillowtop already had a layer of batting and a muslin backing - I added some extra batting to the sides. I sewed on some borders to make it table runner size - quilt-as-you-go style. Then I stitched in the ditch - again - around the center "square" and "borders" - to quilt through all the new layers. I'll play with some FMQ border designs later - and then trim it down to straighten it out - ;))
And while I was in the mood - I fused the Halloween Cheater Panel to a black backing - and quilted in the ditch around all of the "squares" and "borders" - ;))
One of my Craftsy teachers shared a great technique for ditch quilting to make sure the lines come out straight and the quilt remains "square" and doesn't get tweaked in the process - and it works. In this photo - the lighting is poor and makes the backing look gray instead of black - but the quilting shows up pretty well - ;))
One thing about the Craftsy classes - even though I have been quilting since the 70s - if I buy class - I will watch the entire class. I ignore the stuff that I already know and wait for that little "gem" that makes the class worth the money. And some of the older/mature quilters have some really cool tips. They remind me that the best experts are those with the most experience - ;))
BOB thinks that some of the younger so-called experts are just now discovering things that we old white-haired ladies have been doing for years. Reminds me of watching a baby when they first discover their feet - they don't realize that some things have been around for quite a while - and just because they just now discovered it - doesn't make it new - ;))
Next thing you know - they'll be showing us how to use your walking foot for quilting and how to mark quilts so you can quilt on the lines - LOL - ;))
Talk to you later - gotta go - gotta sew -
DESIGN WALL MONDAY -
Check out all of us who link up with Judy L. -
At Patchwork Times on Mondays.
We have some awesome stuff on our walls!
Well, THEY do - ME - not so much sometimes - ;))
===
On my wall today -
Pinwheel Polka is together - but still needs borders. I'm thinking a narrow border of the white with pink polka dots and an outer border of pink(s) and/or green(s) - haven't decided yet - ;))
We all know that a quilt top made with six-inch blocks set 4x6 should (mathematically) come out to 24-1/2" x 36-1/2" with seam allowances - and it does - YAY for me!! - My 1/4" was "playing nice" the whole time - surprise, surprise - ;))
Here's a close-up - lots of points to match- and I gave it my best shot - ;))
I also made the "Heart" for my Memory Quilt - ;))
Today I plan to play with these -
They should make some pretty crumb blocks -
Or maybe even a crumby border - ;))
Talk to you later - gotta go - gotta sew -
Oooh - I LIKE it!! - ;))
I got them all stitched up - trimmed - paper off - and put them on the wall. I tweaked the pattern a little - used ONE polka dot - the WHITE with PINK polka dots - because the name of the block is Pinwheel Polka - and I switched up the values in some areas. When I put them up on the wall - the GREEN seemed to be the first color that I saw - and since I used two different GREENs - I tried to get the same one in both of the center blocks. I used several different PINKs - so I tried to group them the best I could - ;))
And - I tried to match the colored version that I had worked up in EQ7 when I tweaked the pattern - but forgot that it would be REVERSED when it was pieced. Gads, you would think that I would have enough experience REVERSING things that I would have remembered that - oh, well - I made it work ;))
Next time I might tweak the pattern again so that - except for the corners where the WHITE/GREEN sections meet - I don't have to match any points - ;))
And as a side note -
Do any of you remember the song by Brian Hyland -
"Itsy Bitsy Teenie Weenie Yellow Polka Dot Bikini"? - ;))
What was yellow? -
The bikini -
Or the polka dots? - ;))
Me? - I always thought it was the polka dots -
But then again, it's probably just me - ;))
Talk to you later - gotta go - gotta sew -
DESIGN WALL MONDAY -
Check out all of us who link up with Judy L. -
At Patchwork Times on Mondays.
We have some awesome stuff on our walls!
Well, THEY do - ME - not so much sometimes - ;))
===
Happy 4th of July!! - ;))
With all of my computer and sewing "adventures" yesterday - I forgot that today was Design Wall Monday -
So -
On my wall today -
These are the first four Pinwheel Polka blocks from a Craftsy class that I'm taking called - Quick-Strip Paper Piecing - with Peggy Martin. My bloggy buddy, Gene Black is taking the same class and is an affiliate - so I'll give you a link to his post - HERE - where he talks about it. If you click through and purchase the class through his blog, he'll get a small stipend - at NO extra cost to you - and it helps to keep him in supplies - ;))
Peggy's technique is similar to mine with two exceptions - I cut "chunks" and she cuts "strips" - and I trim the excess "before" I add the next piece - she trims "after" - so with just a couple of minor changes in my routine - I was able to do it "her" way - and I LOVE IT!! - ;))
Gene and I tend to go "outside the box" at times - and this is one of those times. I played around with EQ7 and tweaked her Pinwheel Polka pattern a little - I made the background areas a bit smaller and some of the star points a bit bigger - ;))
If you have never tried Foundation Paper Piecing - or if you HAVE tried and simply hated it - I STRONGLY recommend this class. Peggy makes it SO simple - and SO logical - no flipping everything over every two seconds - and the class materials include several patterns and one of her books - an e-book with 115 pages!!! - The book alone is worth the price of the class - AND you get one-on-one lessons for each part of the process - you can't beat that!!! - ;))
Talk to you later - gotta go - gotta sew -
Boy, today was just one of those days - you know - the ones your Momma was talking about when Mama said there'll be days like this - ;))
Last night when I shut down my new computer as usual - it seemed to be taking a verrrrrrrrrry loooooooooong time in Shutting Down mode - so I tried hitting the Power button to shut it down - that didn't work. Then I tried Control-Alt-Delete - that didn't work, either. So - being too tired to care - and too tired to want to deal with it - I went to bed - ;))
This morning after I made my coffee and then checked the computer - it was still in Shutting Down mode - terrific!! - I can't get on the computer to check out how to fix the computer if I can't get on the computer - ;))
So I pulled out the paperwork on the Geek Squad Protection Plan that I bought when I bought the computer and found the dinky little owner's manual that came with the computer - and then I had an idea. I could get on my OLD computer to see if I could find a fix - ;))
It's been a while since I turned on the OLD one - so of course it had some UPDATES it needed to load. And then the security software said it had some UPDATES - so OK - loaded those. Then the security software said that it couldn't complete the UPDATES because the subscription expired - WRONG!! -
So I logged into their site and the subscription is just fine - ;))
Back to the desktop to redo the updates. That seemed to take forever but completed successfully - ;))
Back to the internet to check out the support website for the computer. I had to enter the model number of my computer. Got an error message - couldn't find my model - turned out that I needed to put a "dash" in the middle of the number - who knew? Then I found a forum page with a question regarding my model having a problem booting up - sorta got locked in boot up mode and wouldn't finish the task. So I checked the answer to that one - it sounded like it might fix my problem. Then I tried to print it out. That didn't work - it couldn't print because it's networked to the printer attached to the computer in Shutting Down mode. So I went old school and wrote it all down - in cursive - ;))
Then I tried the solution - and it worked!! Yay, me!! - I didn't have to call the Geek Squad on a Sunday on a Holiday weekend - ;))
Once the new computer was up and running - it printed out the pages I had requested - they were in the queue. I had wanted a copy for my file just in case it ever happened again - I could check the file if I didn't remember the solution - and wouldn't have to worry about trying to gain internet access without a computer - ;))
But the pages were printed landscape and I wanted portrait for my file. AND the landscape pages were only half printed because both ink cartridges were low on ink. I have been ignoring the Low Ink warnings for a while because I'm cheap and run those suckers until they won't print AT ALL. So that meant that I had to change the ink cartridges - not difficult - just not what I wanted to do at the time. Then I re-printed the solution and filed it - ;))
NOW I could start my day - and check my email - and sew - ;))
I added another section to all of my little Foundation Paper Pieced blocks -
AFTER I pressed them ALL open -
THEN - I realized that I hadn't shortened my stitch length and had to press them all back closed - so that I could re-stitch them at the shorter length - ;))
This would be a great "Poor me" post -
If I wasn't laughing so hard - ;))
Talk to you later - gotta go - gotta sew -