Monday, February 25, 2013

Design Wall Monday - 2/25/13

DESIGN WALL MONDAY - 2/25/13
Check out all of us who link up with Judy L. at Patchwork Times on Mondays.
We have some awesome stuff on our walls!
Well, THEY do - ME - not so much sometimes - ;))
===


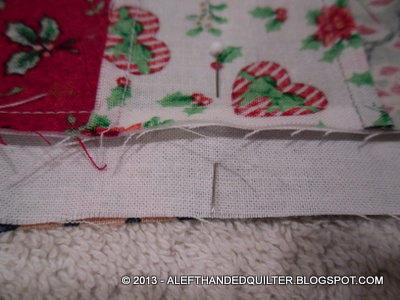
You may not be able to see in this photo -
But I machine appliqued the Gold halos and the top three stars -
On the Folk Art Christmas Tree - HERE -
Folk Art Christmas - by Cindy Taylor Oates - (c) Taylor Made Designs -

It is one of my entries in the LTRTCWSA - 2013 -
Leisurely Turtle Race To Christmas With Squirrels Allowed - 2013 -

The little “Race” that Linda - HERE - and I started - HERE -


And I made another bunch of blocks for my LHQSQ -
Left-Handed Quilter Sampler Quilt -

They still need sashing -
But the blocks themselves are done - ;))

Block #76 - Mississippi -


Block #77 - Nine-Patch Variation -


Block #78 - Nine-Patch 2 Variation -


Block #79 - Bird of Paradise -


Block #80 - Optical Illusion -


I also spent some time reading blogs -

I found a TERRIFIC one-block quilt pattern -
On Marge's blog - Delaware Quilts - HERE -
Be sure to read her post and the comments -
Then follow the link to the pattern - ;))

And BOB found a review on that Modern Quilting ebook -
Glowingly positive as expected -
And funny, too -
Once again proving that Spell/Grammar check -
Only work when you use the right word -
In the first place -

I’m not going to give you the link to it -
Because I don’t want to embarrass her -
But here is a quote from her review -
This eBook gives you three very fun and impressive quilts to make. As someone who is in the processed of developing her own patterns, I take a special interesting in how directions are written. I’m very impressed with this eBook and how clearly everything is laid out. The directions are clear and easy to follow. I defiantly could take lessons from these people.
BOB usually laughs at typos -
Like processed and interesting -
We ALL make those -

But did you catch the last sentence? -

Reminds BOB of the line in Princess Bride -

I do not think it means what you think it means - ;))


Talk to you later - gotta go - gotta sew -


Friday, February 22, 2013

I like it -

A while back -

I re-arranged my sewing room - HERE -

I set up ALL FOUR of my sewing machines -

In the same room -

At the same time -

Each one for a specific purpose -

One for Free-Motion Quilting -

One for Foundation Paper Piecing -

One for Machine Applique -

And one for Piecing -

And it seems to be working very well - ;))

Right now I’m working on some LHQ Sampler Quilt blocks -

And I can “scoot” from the ironing board -


To the machine set up for Foundation Paper Piecing -


And then back to the ironing board to press -


And then on over to SuzieQ to Piece the block - ;))


I stand up to cut at my Cutting Table -

But other than that -

I just “scoot” from one work station to another -

And I LIKE IT!! - ;))


Talk to you later - gotta go - gotta sew -


Wednesday, February 20, 2013

Free ebook copy -

I was contacted last week -

By the Online Media Coordinator -

For a certain publisher -

Asking if I would be interested in reviewing one of their ebooks -

The email went like this -

Hi,

I am not sure if you recall, but I found your quilting blog and tried to contact you a while back to see if you were interested in reviewing one of our (insert name here) ebooks.

Not sure if you received my email or was (sic) not interested in the (insert title here) ebook. But perhaps you will be interested in reviewing our other ebook about Modern quilts.

Would you be open to reviewing our Modern Quilts & patterns ebook if I send you a free ebook copy?

Please let me know either way, and I can send a copy over. I am trying to get feedback and spread the word about our free ebooks. Thanks

Sincerely,
blah-blah

===

My reply went like this -

Hi,

Yes, I do recall your email and my response - "No thanks - ;))"

It seems that I may not be your best choice to review your ebook on Modern Quilting as I am not a fan of ebooks nor am I a fan of Modern Quilting.

I am also skeptical of blogger reviews - ALWAYS positive - of items that the blogger got for FREE. Whether it was or not - It appears to be a glowing review because it WAS free. However - since(edit) your ebooks appear to be FREE to everyone who provides you with an email address.

So - I would be open to reviewing your ebook on Modern Quilting - if you are open to the possibility of perhaps getting a negative review.

===

Haven’t heard from him - ;))

I know that I probably should be flattered -

That he thought to ask me to review their ebook -

And - in a way - I am -

BUT -

I an NOT a fan of FREE advertising -

In exchange for FREE stuff -

Which isn't actually FREE at all - ;))

This FREE ebook requires my/your email address -

And that puts me/you on their list to get "newsletters" -

And advertising up the wazoo -

In other words - TONS of FREE junk email - ;))

And the FREE ebook isn't FREE -

If I have to use MY paper and MY ink -

To print it -

Paper and ink cost $$$ - ;))

I may be saving on shipping costs -

But the printing costs are ALL mine - ;))

What ever happened to THEM printing the book -

And using THEIR $$$ to buy the paper and ink -

And then just mailing it to me all bound and everything? - ;))

AND - it seems to me that he hasn't read much of my blog -

Or any of my Reviews -

Or Quilter BOB's blog -

Because Quilter BOB did a post on "digital magazines" - HERE -

That says pretty much the same thing - ;))

And as far as Modern Quilting goes -

Quilter BOB already talked about that, too - HERE -

So - let me ask you -

If their website already has a page for FREE PATTERNS -

Why don't they just add a page for FREE EBOOKS -

And let it go at that? -

Why ask someone to do a REVIEW? -

So that they can get FREE advertising -

And I can get FREE junk email??

No thanks - ;))


Talk to you later - gotta go - gotta sew -

EDIT UPDATE -
Well I heard from him -
AFTER I posted my post - ;))
He waited 7 days to respond -
And then sent me a PRIVATE email -
When he could have left a PUBLIC comment -
Interesting - ;))

Monday, February 18, 2013

Design Wall Monday - 2/18/13

DESIGN WALL MONDAY - 2/18/13
Check out all of us who link up with Judy L. at Patchwork Times on Mondays.
We have some awesome stuff on our walls!
Well, THEY do - ME - not so much sometimes - ;))
===


This weekend I was messing with my blog settings -

Trying to make it easier to see/read -

And instead of always using the BOLD feature -

I decided to change the font size to a larger one - ;))

Wouldn't you know -

Blogger changed the font size on ALL 600+ published posts -

That have ALREADY been formatted in BOLD - ;))

So - if you want to go back to read an old post -

It is now both in BOLD and a larger font -

Leaving NO doubt that you will be able to SEE/READ it - ;))

What do you think?

Should I change it back?

===

As far as my design wall goes -

I played a little with my FPP Hearts -

The ones for my Memory Quilt - ;))


I have over 60 of them -

And I can’t decide on a layout - ;))

I could applique each of them -
To their own little square -
And deal with them that way -

Or -

I could set them in one giant circle -


Or I could set them in vertical rows -
Maybe with plain alternating rows -
Or alternating rows of 9-patches -


Or in groups of four -
Some would be sideways -
Or upside down -


Or alternating vertical rows -
Again - some would be upside down -


Or in zig-zag vertical rows -


Or in circles -
Which makes star shapes in the middle -


Or in some other vertical variation -


I’d like to come up with a layout -
That would allow me to keep them in chronological order -
A timeline of sorts of the quilts that I have made -
Through the years -

I'd like to come up with a layout -
That would allow me to label them -
Showing the date and name of each quilt -

I’d like to come up with a layout -
That would allow me to add to it -
As I make new quilts -
And new hearts -

I have another dozen hearts made -
But the quilts aren’t quilted yet -
So they’re not technically “done” -
But in my world they are probably as "done" -
As they are ever going to get - ;))

Any suggestions?? - ;))


Talk to you later - gotta go - gotta sew -


Friday, February 15, 2013

Valentine's Day Sudoku Quilt - One more photo -


This little quilt is SO pretty -

But somehow the brightness of the "reds" -

Just doesn't come across well -

So I had to try again - ;))

It's probably my lighting -

Or my camera -

Or me - ;))

But here's another photo -

Of the top LEFT corner -

What other corner would it be? - ;))


Talk to you later - gotta go - gotta sew -


Thursday, February 14, 2013

Valentine's Day Sudoku Quilt - The Border is On! -

In my last post I still needed the borders on my Valentine’s Day Sudoku Quilt -

I had some VERY pretty reds in the blocks themselves -

My bloggy buddy - LindaJ - life, quilts and a cat too - HERE -
Might recognize the White Squares with Little Red Hearts -
She included those with some scraps that she traded me -


In my stash was a beautiful Red Swirly Print -

That I had been hoarding saving for something SPECIAL -

And then I remembered my Rule #12 -

Rule #12 - Use your BEST fabric - while you still can!

So I USED it - ;))


TA DAH!! - ;))


Talk to you later - gotta go - gotta sew -


Valentine's Day Sudoku Quilt -


These little Sudoku quilts -

Are like potato chips -

You can’t make just one - ;))

After I chose my fabrics -

And cut my little squares -

This -


Soon became this -


And then I couldn’t decide between -

White sashes and Red cornerstones -


Or -

Red sashes and White cornerstones - ;))


So when the White sashes won -

This -


Became this -


And then this - ;))


It still needs borders -

But the day ain’t over yet - ;))

HAPPY VALENTINE’S DAY!!


Talk to you later - gotta go - gotta sew -


Monday, February 11, 2013

Design Wall Monday - 2/11/13

DESIGN WALL MONDAY - 2/11/13
Check out all of us who link up with Judy L. at Patchwork Times on Mondays.
We have some awesome stuff on our walls!
Well, THEY do - ME - not so much sometimes - ;))
===


I’m still working on Easy Street Detour -
My version of “Easy Street” -
Bonnie Hunter’s Easy Street Mystery Quilt - HERE -

But I won’t bore you with that now -
Other than to show you a photo of the Block A sets -
All kitted up and ready for their own little baggies -


I get bored easily -

And I like to switch between projects -

So I spent most of yesterday just cutting stuff up -

“Cutting and Kitting” as they say -

For some variety in color - pattern - block size - etc. -

Boy - I gotta tell you -

After working on 15” Blocks -

The 6” LHQSQ - LHQ Sampler Quilt ones seem REALLY little - ;))


Talk to you later - gotta go - gotta sew -


Sunday, February 10, 2013

TUSAL - 2/10/13


I have joined hundreds of other stitchers in Daffycat’s TUSAL 2013 - HERE -

It's a Totally Useless Stitch-A-Long - ;)) -

To play the game -

I have to fill my glass container -

With saved thread clippings -

Or ORTS - Old Ratty Threads -

Fabric trimmings -

Stitching cast-offs -


And then -

On the New Moon -

Take a picture of the ORTS in my jar -

Post it to my blog -

With a link back to her TUSAL post - HERE -

And label the Totally Useless posts with “TUSAL” -

It's EASY -

It's TOTALLY USELESS -

And -

It's FUN!! - ;))


Talk to you later - gotta go - gotta sew -


Friday, February 8, 2013

Progress Report - 2/8/13


I’m still working on my version of “Easy Street” -
Bonnie Hunter’s Easy Street Mystery Quilt - HERE -

I call mine "Easy Street Detour" - ;))

============
Note - these instructions are written in LEFTISH.
If you are right-handed - just reverse the directions.
============

After I finished my Block Bs -


I spent some time sorting out -
Shaded 4-Patch Combos -


I need 16 sets of 4 for the Block As -


I already had the Stacked Geese Combos -
Matched up with Center Squares -
16 sets of 4 + 1 -


Stitch up a set of Shaded 4-Patch Combos -
For the first Block A -


Add a set of Stacked Geese Combos with a Center Square -


Lay them out as a 9-Patch -


And NO -
I did NOT notice that the block -
In the lower left corner -
Was turned the wrong way -
Until AFTER I had sewn it together - ;))


So after I fixed it -


I put it up on the design wall -
With some Block Bs -


I think I like it - ;))


Talk to you later - gotta go - gotta sew -


Wednesday, February 6, 2013

More "Office" stuff -


I have been pushing paper -

And pushing paper -

And pushing more paper - ;))

Reminds me of a video I saw a long time ago -

On that home video TV show -

A dog pushing a rock with his nose -

Pushing a rock -

Pushing a rock -

That’s me - ;))

Anyway -

In the middle of all of the “Office” stuff -

We had to buy a new printer -

HP Deskjet 2512 -
$44.00 at Sam’s Club -


Replacement ink cartridges -
Cost about $51.00 -

So -

Let me see if I understand this -

When we run out of ink -

I can spend $51.00 and get two ink cartridges - one black - one tri-color -

OR -

I can spend $44.00 and get two ink cartridges - one black - one tri-color - AND a printer -

Right?? - ;))

I can spend LESS $$$ AND a get a FREE Printer?!?!?! -

You gotta luv today's marketing geniuses - ;))


Talk to you later - gotta go - gotta sew -


Monday, February 4, 2013

Design Wall Monday - 2/4/13

DESIGN WALL MONDAY - 2/4/13
Check out all of us who link up with Judy L. at Patchwork Times on Mondays.
We have some awesome stuff on our walls!
Well, THEY do - ME - not so much sometimes - ;))
===


I spent SO much time last week -

Pushing paper -

And drafting and editing my Christmas Sudoku Quilt tutorial -

That I really didn’t get much else done - ;))

It wasn’t until I actually posted Part 1 on Saturday - HERE -

And scheduled Part 2 to go “live” on Sunday -

That I finally had a chance to SEW something -

So I made the Foundation Paper Pieced “Heart” -
For the Christmas Sudoku Quilt -

For my Memory Quilt -


It's not much -

But it’s SOMEthing - ;))


Talk to you later - gotta go - gotta sew -


Sunday, February 3, 2013

LHQ - Christmas Sudoku Quilt - Tutorial - Part 2 -

============
Note - these instructions are written in LEFTISH.
If you are right-handed - just reverse the directions.
============

OK - this is next time - ;))

This tutorial is a continuation of Part 1 where I showed/told you -

How To Make A Sudoku Quilt - HERE -

This is How I Make Sashings and Cornerstones and Borders -

STEP 7 - Add sashings and cornerstones -
My blocks measure 5” x 5” when sewn together -
And I want my sashing/cornerstones to be 1/2” wide - finished -


For this you will need -
From Part 1 -

  • Sashing strip - 5” x 10” -
  • Sashing strip - 5” x 16” -
  • Cornerstone strip - 1” x 16” -
  • Cornerstone square - 1” x 1” -
  • Border fabric - to be determined later - ;))

I used White for my sashings -
Red for my cornerstones -
And Blue for my borders -

So I cut -

White sashing strip - 5” x 10” -
White sashing strip - 5” x 16” -
Red cornerstone strip - 1” x 16” -
Red cornerstone square - 1” x 1” -

I always start with the sashing -

White sashing strip - 5” x 10” -
Cut into nine (9) strips - 1” x 5” -


9 White sashing strips plus one Red cornerstone square - 1” x 1” -


Then I add the cornerstones to the mix -
White sashing strip - 5” x 16” -
Red cornerstone strip - 1” x 16” -
Sew strips together -


Press AWAY from the Red cornerstone fabric -
And cut the sashing/cornerstone combo strip into 15 - 1” strips -
My strips weren't long enough so I cut 9 from one and 6 from another set -


Lay out the blocks - in order -


Sew a plain sashing strip to the RIGHT side of each block -
Press AWAY from the block -
9 blocks - 9 plain sashing strips -


Add a sashing/cornerstone combo strip -
To the BOTTOM of each block -
Press AWAY from the block -
9 blocks - 9 sashing/cornerstone strip combos -


When I sew them together -
I put the sashing/cornerstone combo strip on top -
And feed it through with the cornerstone leading -


And this is a great time to make sure your blocks are the right size -
That bottom edge is RIGHT ON!! - ;))


So far - so good - ;))


All we have to do now is finish the outside edge -


Add a sashing/cornerstone combo strip to the TOP of Block #2 and #3 -
And a sashing/cornerstone combo strip to the LEFT side of Block #4 and #7 -
4 more sashing/cornerstones used -


I left Block #1 for last -
It will use the last 2 sashing/cornerstone combo strips -
And the Red cornerstone square -


I sewed the TOP sashing/cornerstone combo strip on first -
And sewed the red square to the TOP of the LEFT sashing/cornerstone combo strip -
Before adding it to the LEFT side of the block -


Now - do you see what I see? -

I see ANOTHER 9-Patch - ;))


Gee - wonder how I should put that together?? -

Just kidding - ;))

But before I sew these blocks together -
I need to do some re-pressing -
Because I pressed all of the seams AWAY from the blocks -
Some of these blocks will not NEST properly -


BUT -

If I re-press the TOP seam on Block #2 -
And the BOTTOM seams -
On the MIDDLE blocks -
Block #2 and #5 and #8 -

TOWARD the block -
They should nest nicely - ;))


So - the rest is just standard assembly stuff -

Chain piece Block #2 to #1 -
Block #5 to #4 -
Block #8 to #7 -
With the cornerstone leading -
I don’t press yet - ;))


Then chain piece Block #3 to #1/2 -
Block #6 to #4/5 -
Block #9 to #7/8 -


Now I press - ;))

I press to the path of least resistance -
The side sashings on the top and bottom row -
Get pressed AWAY from the block -

The side sashings on the middle row -
Get pressed to the RIGHT -

When I sew the rows -
I flip Row #1 down on top of Row #2 -
So that Row #2 is on the BOTTOM -
With all of the seams going DOWN -
WITH the feed dogs -
And Row #1 is on TOP -
Where the seams can be nested easily -


I don’t “pin” my short rows -
I just put pins in roughly where the sashings meet -
I will “nest” them with my fingers -
When I get to them -


When the rows are together -
Give it a good press -


Mine stretched a bit -
And came out to 16-1/2” square -
Mathematically - it should be 16” square -
So before you cut the borders -
Be sure to measure it - ;))

STEP 8 - Add the borders -
My borders are cut at 3-1/2” wide -
And will finish at 3” -
Making my little Christmas Sudoku Quilt -
Finish at or around 22" square - ;))

I don’t actually “measure” my border lengths -

I do the side borders first -
And lay two border strips out on top of the quilt top -
Matching the top of the strips to the top of the quilt top -
(So - how many times can YOU use the word “top” in three lines? - haha - ;))


Smooth them out -


And cut them even with the bottom of the quilt top -


Sew one to each side -
I DO "pin" my borders when I sew them -
And I pin the corners in BOTH directions -
To help keep them square -


And press them to the border strips -


And then do same thing with the top and bottom borders -

Lay two strips out across the top from side to side -
Match the RIGHT side of the strips to the RIGHT side of the quilt top -


Because I am LEFT-HANDED -
I will cut them even with the LEFT side of the quilt top - ;))


Sew them to the top and the bottom -
Again - pinning to keep those corners square -


With pins at the sashings -


And pins in the middle of the blocks -


Press them to the border -

And -

TA DAH!!


My Christmas Sukoku Quilt center square -

One of each of these fabrics appears in -
Each “Box -
Each “Column” -
And each “Row” -

That's Sudoku - ;))


All I have to do now is -

Layer - baste - and "quilt as desired" -

And who knows when THAT will be - ;))


Talk to you later - gotta go - gotta sew -


LinkWithin

Related Posts Plugin for WordPress, Blogger...