Are NOT created equal - LOL - ;))
I still haven't found my mojo -
But while I was looking for it -
I ran across yet another pattern with BIAS edges all around -
And - even though I am NOT the quilt police -
And you can do as you please -
It IS one of my pet peeves -
So I thought I would post another Public Service Announcement - ;))
I know that most of my readers know that there is a difference between
HST (Half-Square Triangles) and QST (Quarter-Square Triangles) -
And they know - when used in blocks or quilts set "on-point" -
Which one goes where - and why - ;))
It all depends on which way the STRAIGHT of grain goes -
One has it on the straight sides -
One has it on the diagonal -
And which one is which depends on how you cut the original "square" -
And which triangle you get as a result - ;))
Some new quilters may not realize that there is a difference between the two -
And apparently some designers don't know and/or don't care -
I have even seen a die that has them oriented incorrectly on the "board" -
And some think that "a triangle is a triangle" -
Well - it is - but it isn't - LOL - ;))
They each serve a different purpose -
One is used for the corners -
And one is used for the side triangles -
They are NOT interchangeable -
So - this is a Public Service Announcement -
IF you find a block or pattern set on-point -
That has you cut MORE than FOUR HALF-SQUARE TRIANGLES (HST) -
For the sides and/or corners -
It will have ALL of the OUTSIDE EDGES ON THE BIAS - ;))
HOW do I know? -
Simple -
HST - Half-Square Triangles are made several ways - but the ORIGINAL way - and how it got the name - was to start with a square and cut it in HALF - by cutting diagonally ONCE from corner to corner - like this -
When you cut a square that way -
The outside edges of the CORNERS are on the STRAIGHT of grain -
And the diagonal is on the BIAS -
And you only need FOUR of them for ANY rectangular or square quilt - ;))
The pattern I saw - which I will not identify - so I do not embarrass the designer -
Said that you need FOUR triangles for the corners -
So - you were to take a square -
And cut it diagonally TWICE from corner to corner - like this -
True - you get FOUR triangles -
BUT -
When you cut a square that way - you get QST - Quarter-Square Triangles -
The outside edges of the corners are on the BIAS -
And the DIAGONAL is on the STRAIGHT of grain -
And you don't want that in the corners -
Because the outside edges will stretch out of shape -
You want those QST as the SIDE triangles -
Because the DIAGONAL is the STRAIGHT outside edge - ;))
And I don't care how BIG you make your block - or quilt -
It will NEVER have more than FOUR corners -
Assuming it's a rectangle or a square - LOL -
So you will NEVER need MORE than FOUR HST for the corners - ;))
So -
Once again -
IF you find a block or pattern set on-point -
That has you cut MORE than FOUR HALF-SQUARE TRIANGLES (HST) -
For the sides and/or corners -
It will have ALL of the OUTSIDE EDGES ON THE BIAS - ;))
If you're OK with that -
That's fine -
But I'm not - LOL -
I want my CORNER triangles to be on the STRAIGHT of grain -
I want my CORNER triangles to be HALF-SQUARE TRIANGLES - ;))
Talk to you later - gotta go - gotta sew -
Easy Street Detour Around the World -
Is quilted -
Finally!! - ;))
It's actually square -
The left side is folded under because it didn't fit between the cabinets and the kitchen island -
And - because of the way I "built" it - it doesn't need binding -
And is reversible -
It has a long history - starting out as a mystery quilt - taking a detour - becoming an oversized monster - and an experiment - which actually worked - LOL -
I thought of quilting one round with curved lines about 2" apart and then going back to stitch another line between those - but - considering how long this took me to quilt - I decided to let the one round be the "only" round -
It still needs a label -
But -
I'm calling it DONE - LOL - ;))
Talk to you later - gotta go - gotta sew -
It doesn't look that exciting -
But I AM making progress -
This is the next section that I will be playing with -
It's a corner section so I'll shift the bulk of the quilt to the left - and start at the edge on the right hand side by that orange pin moor - then follow along that curved line -
I'm getting bored with it -
And I'm losing my mojo -
That might be one reason why it's taking me so long - LOL - ;))
Talk to you later - gotta go - gotta sew -
On the "walking foot" quilting - ;))
My Walking Foot has a notch in the back to hold a quilt "guide" -
It came with two -
One to follow the quilting line on the left -
And one to follow the quilting line on the right -
I prefer to use the one on the left -
So the bulk of the quilt keeps shifting to the left -
And not to the right -
If it shifts to the right -
It will all wind up scrunched under the throat of my sewing machine -
Which doesn't sound like a good idea to me -
But then again -
It's probably just me -
Because -
The Ultimate Quilt 'n Stitch Presser Foot - by Clover -
Available at Nancy's Notions - HERE -
Is designed that way - LOL - ;))
Anyway - it's looking good -
Even if it does seem to be stitching up -
Slower than molasses - LOL - ;))
Talk to you later - gotta go - gotta sew -
But surely -
It all comes together - ;))
I was going to mark some quilting baselines using a blue marking pen -
But then realized that they would be hard to see on a quilt this large -
So I switched and used blue painter's tape to mark my baselines -
Knowing that I probably couldn't sew many AWESOME lined-up seams - LOL -
I opted instead to lay the tape out in sweeping gently curved lines -
Making sure to stay clear of the re-pinned UNSEWN part of the AWESOME seam -
Since I don't want to get ahead of myself -
And start quilting before I stitch it closed - LOL - ;))
I'll stitch to one side or the other of the tape -
And once the baselines are stitched -
I'll remove the tape and quilt one section at a time -
Echoing the baseline with lines about two inches apart -
Then I'll go back and stitch another line down the center of the echo lines -
That somehow sounds easier than trying to stitch a line every inch or so -
And I should be able to accommodate variations in the width of the sections -
The echo lines should stabilize it quite a bit -
So that I can remove the pins as I go along -
At least that's the plan - LOL - ;))
Talk to you later - gotta go - gotta sew -
I get ahead of myself - ;))
Promise you won't laugh -
And I'll tell you what I did - ;))
After binge watching a bunch of my Craftsy/Bluprint videos on FMQ -
I thought that - before I get too involved with my Mountain To Be Quilted -
I would get my "walking foot" project ready to go -
So I had something else to play with when I want/need a break -
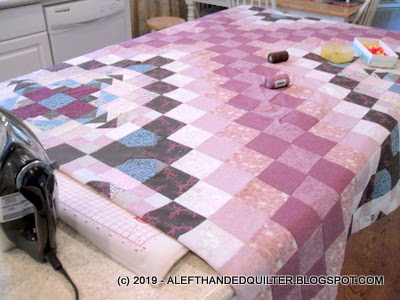
I spread it out on the kitchen island -
And found two matching threads for the quilting -
A Dusty Rose -
And a Chocolate Brown -
I knew that I needed to close up the opening that I used to turn it inside out -
So I pinned it closed - trying to match the points -
With pins on either side of the point -
And one pin down the center to keep the seam together until it got stitched -
All pinned and ready to sew -
I did a single line of stitching - very close to the edge -
With Dusty Rose thread on the top -
And Chocolate Brown in the bobbin -
And I did an AWESOME job - LOL - ;))
From the back - it lined up so well that you can't tell that I couldn't see where I was sewing -
But - like I said -
I got ahead of myself -
When I spread it out to press/fuse the layers together -
I found big lumps of batting bunched up in several areas -
Note to self - Next time use a SINGLE sheet of batting -
This is NOT the place for franken-batting - LOL - ;))
I forgot that I had left that opening OPEN on purpose -
So that I could stick my arm in there to straighten out the lumpy batting -
BEFORE I stitched the opening closed -
So - I spent some time "un-sewing" some of that AWESOME seam -
Not all of it - mind you -
Just enough so that I could stick my arm in there and straighten out some parts -
Then I spread it out - again - and pressed/fused the layers together -
And pinned it to stabilize it before I take it to the sewing machine -
To RE-SEW the UN-SEWN part of that AWESOME seam - LOL - ;))
Talk to you later - gotta go - gotta sew -