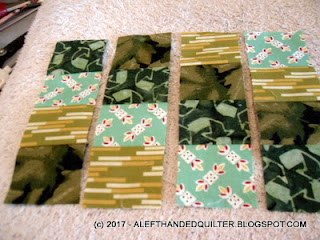
For a friend who likes to cook - ;))
These were inspired by a free pattern by Vivika Hansen DeNegre -
That I found on Quilting Daily - HERE -
Vivika is the editorial director of Quilting Arts, Modern Patchwork, and related titles. In addition to writing and reading about quilts, she enjoys the creative process of the craft, including hand and machine stitching.I switched up parts of her tutorial - and made mine a little differently - ;))
I started with a package of Insul-Brite® - Needle Punched Insulated Lining -
And cut ten squares 8" x 8" -
Then cut some Warm & Natural™ into five - 8" squares -
And gathered five 1/4 yard lengths of fabric - 9" x 40" -
Pressed the fabrics -
Opened them up -
Layered them RIGHT SIDE UP -
Started at the RIGHT end of the stack -
Cut a section 8" wide (8" x 9")-
And six strips @ 2" wide (2" x 9") -
Set the 8" section and two of the strip sets aside for the time being -
Shuffled the first four stacks -
And sewed the strips together in sets of four -
Pressing them like so -
Then sewed each set into a "tube" -
Cut the "tube" into four 2" segments -
Un-sewed each set in a stair-step design - like Trip Around The World -
You can see how the segment seams will "nest" when they are sewn together -
Sewed them together -
Got five "tops" -
With four fabrics in each -
Took one of the two strip set piles that had been set aside earlier -
Cut the strips down to 6-1/2" -
Then for each "top" -
Found the "fifth" fabric that was not used in the "center" -
And sewed the 6-1/2" strip to one side -
Pressed all of the seams to the RIGHT -
Cut the remaining strip set stack to 8" -
And the 8" section to an 8" square -
Added the matching 8" strip to the long side of the block -
Pressed it all nice and neat -
And started making my stacks -
Insul-Brite® - shiny side down -
Warm & Natural™ -
Insul-Brite® - shiny side up -
Backing 8" square - right side up -
"Top" - right side down -
When I stitched around it - leaving a 3" opening - and turned it inside out -
It was WAAAY too stiff -
So I "unsewed" it - and tore one of the squares on the side -
Rats! -
Guess that "test" one will be added to my scrap bin - ;))
Do over -
And because I didn't really like the part that said to "turn it inside out - and hand stitch the opening closed" -
I found some pre-packaged Wide Single Fold bias tape in an olive green to use for binding -
Thinking that I could just change the layering sequence -
Leave out one of my Insul-Brite® layers -
And bind them like little mini-quilts - ;))
Which I did -
Backing 8" square - right side down -
Insul-Brite® - shiny side down -
Warm & Natural™ -
"Top" - right side up -
I sewed the bias tape to the back and folded it to the front - stitching it down with a decorative stitch -
Then I quilted them "in the ditch" in the middle square and the 9-patch around that -
You can see the quilting better from the back - ;))
Quick little project - except for the "unsewing" - and maybe just what I needed to get my sewing/quilting mojo back - ;))
Talk to you later - gotta go - gotta sew -


4 comments:
That is a great method for making several at once. If I make them I prefer to avoid having to bind them. LOL
These are great.
Thanks for the comments! - ;))
Gene - Haha - when I make them I prefer to avoid having to hand stitch them - LOL - ;))
Kathaleeny - Thanks, lady! - ;))
Sure are a lot prettier than what I pull out of my drawer for use.
Post a Comment