All 25 Sampler Blocks are sewn together -
With the Sashing - Cornerstones - and Border Blocks -
Ta Dah!! - ;))


Feel free to assemble it any way that works for you - ;))
True confession time -
I "sashed" the blocks and added the "combo" sashing/cornerstones -
as I went along -
And it worked wonderfully for assembling the long rows of blocks -
BUT -
I ran into "pressing issues" when I went to sew the rows of blocks together -
So I don't recommend that method - LOL -
I recommend that you assemble the top in separate rows -
Of blocks with sashing between them -
And sashing rows with cornerstones - ;))
Start with the longest diagonal row -
And sew a plain Sash between the blocks -
Add the Border Blocks - with a plain Sash between them -
And add a plain Sash to each end of your row of blocks -
Press all of the blocks TO the Sashing strips - ;))

Then sew a row of Sashing and Cornerstones -
Press the Cornerstones TO the Sashing strips -
I started with a Sash that had a Cornerstone on each end -

And added Sashes with one Cornerstone - one right after another -
Making sure to sew with the Sash on top and the Cornerstone on the bottom -
So I didn't accidentally get them mixed up -

Sew the Sashing/Cornerstone strip to the TOP of the block row -

And add another Sashing/Cornerstone strip to the BOTTOM of the block row -
A Corner HST will be added to each end later -

Then I worked my way out to the upper left Corner -
Sewing a plain Sash between the blocks - and one to each end -
Then adding Sashing/Cornerstone rows to the TOP of the block rows -

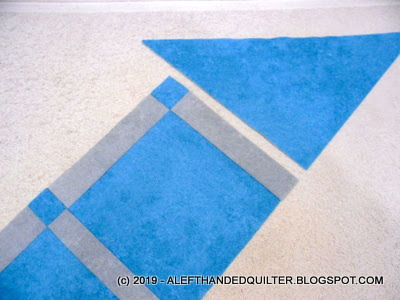
And Side Triangles to the end of each row -

When I ran out of room on my design wall -
I moved those rows to my cutting table and started on the Corner section -

One row at a time -


Got to the Corner -

And realized that I wanted a BIGGER Corner Triangle -

So I revised the cutting instructions -
And increased the size of the Corner Squares to 10" -
2 squares cut once diagonally for 4 HST for the Corners -

For a placement guide -
I folded the Border Block in the second row in half and pressed it to mark the center of the block -

Then used that mark to line up the point on the Corner HST -

Pinned it and sewed a 1/4" seam -


Pressed it open - toward the Corner HST -


And then put together the Bottom Right corner -
And the remaining rows -
With the Sashing/Cornerstone rows on the BOTTOM of the block rows -
And sewed all of the rows together -
Then added the Corner HST to the Top Right and Bottom Left corners - ;))

The extra row of Border Blocks -
And the oversized Side Triangles serve as a "built-in" border -
So I don't have to sew any more looooooooooooooong seams - ;))
One thing I might change - if I were ever to do it again -
Is to make the Cornerstones on the outer edge a different color -
So that they wouldn't blend in with the Side Triangles - ;))
I think it actually took me longer to ASSEMBLE the rows -
Than it did to make ALL of the blocks - LOL -
But I think it was worth it - ;))
THANKS for playing along -
I hope you like your LHQ Sampler Quilt Version 2.0 -
As much as I like mine - ;))
Talk to you later - gotta go - gotta sew -

3 comments:
I have my blocks made, but I haven't gone any further -yet. I do have a layout planned and photographed so I can put them in the same order again.
Great looking quilt top!
I have to admit, I've been watching but haven't been playing along. Not due to lack of interest, but due to "get it done itis".
I have been working on completing some of the "too many to count" UFO's and WIP's that I have so that I don't feel too much guilt when I start a new project.
Looking forward to seeing the finished quilt.
Your sampler really turned out nice. Love those colors and really appreciate the lesson of assembling when setting on point. I don't do that often enough to ever remember.
Post a Comment