Last year about this time -
I did a REVIEW on my new sewing machine - HERE -
Brother SQ9050 - Computerized Sewing and Quilting Machine -
Made by Brother - here -
Made in China
I named her SuzieQ -
And now that I have had her for about a year -
I thought that it was time for an update - ;))
Last year I said -
Summary -
I have only had this machine for a very short time -
And I have just scratched the surface in terms of what she can do -
And I have some more testing/playing to do yet -
And some reviews have said that she develops tension problems about six months down the road - so we’ll have to wait and see about that -
But -
From what I have seen/done so far -
What it can do -
And - especially - for the PRICE -
I think that it’s quite a cool little sewing machine!! - ;))
Would I recommend this sewing machine?
YES
Since then -
I have made two Edit Updates -
Both related to tension issues -
EDIT UPDATE - 8/29/13 -
As I told Miau in the comments below - HERE -
YES - she still does a good job!! - ;)) I use her mostly to do my piecing - and use Method #2 described above - Stitch #43 with the zig-zag presser foot "J" - and my stitch guide. Her tension messed up on me ONCE - I simply turned her OFF for a second - then turned her back on - sort of like re-booting your computer. When I turned her back on - all of the tension settings had re-set to the defaults - and she was fine - ;)) Would I still recommend this machine? - YES!! - ;))
EDIT UPDATE - 11/6/13 -
Today I was having some tension issues - loops were showing on the back of the fabric. I turned her off - re-threaded both the top thread and the bobbin - turned her back on - and she was back to normal - ;))
So -
Yes - I had tension issues on occasion -
But the solution was simple -
Turn her off for a second -
Re-thread her -
Top AND bottom -
Turn her back on -
And she was good to go - ;))
Would I STILL recommend this sewing machine?
YES
Talk to you later - gotta go - gotta sew -
LEFT-HANDED QUILTING - Review - Brother SQ9050
============
Note - these instructions are written in LEFTISH.
If you are right-handed - just reverse the directions.
============
Today I want to show you my new sewing machine -
Lots of features -
And VERY reasonably priced -
My kind of sewing machine!! - ;))
But first -
Disclaimer -
I am in no way affiliated with the manufacturer or supplier of this product - to my knowledge.
I did not get this product for FREE in exchange for a review - aka barter. I paid for it.
I have no intention of slandering or libeling anyone or any product.
I am simply stating my opinions - I could be wrong - you may disagree.
My opinions are based on my experience with this product - your results may vary.
I think that about covers it - if I missed something - let me know.
I am not a lawyer - and I am just trying to cover my a$$. ;))
===
I have THREE sewing machines already and didn’t really NEED a new one -
But I was looking for another basic sewing machine for piecing and found this -
It’s called the -
Brother SQ9050 - Computerized Sewing and Quilting Machine -
Made by Brother - here -
Made in China
Description -
It is described as a "Computerized Sewing and Quilting Machine" -
And Includes a Built-In Sewing Font for Basic Monogramming -
I think that it's technically an "Electronic" machine -
If you define a "Computerized" machine as one with USB computer capability -
This machine has computerized parts - but no USB computer connection/port -
The USA version has a polarized plug (one blade is wider than the other) for the wall outlet -
I'm not sure if other versions are available for other countries -
You might need to contact the company about that - ;))
Where you can get it -
I picked mine up at Walmart for $200 - here - ;))
If the store doesn’t have one in stock - have them order it for you -
I wouldn’t recommend ordering it online - I’ve had trouble with their site - ;))
What you get -
Some Quick Start Guides - an Instructional DVD - and a 77 page Operation Manual -
100 Built-in Stitches -
An Alphabet Font -
On a little Flip Chart -
There’s a set of buttons to tell the machine which set of stitches you want to use -
And then there’s the Start/stop button -
The Reverse button -
The Needle Up/Down button -
The Speed Control -
And a whole BUNCH of other stuff - ;))
What I LIKE about this sewing machine -
It came with a LOT of “extras” that other sewing machines do NOT include -
An extension table - 14" total -
Eight inches to the LEFT of the needle -
AND our favorite QUILTING goodies -
Walking foot -
FMQ spring foot -
1/4” foot -
Quilting guide -
It has THREE different ways to sew a 1/4” seam -
It has an ALPHABET font for monogramming - or quilt labels - ;))
LED light on needle area -
Button for needle up/down - raise or lower the needle -
Stop/start feature - you can sew without the foot controller -
Needle threader -
Stipple stitch - honest! - I’ll show you in a minute - ;))
What I DON’T like about this sewing machine -
The only thing that I DON’T like so far is that the default stitch is #00 -
And that is the LEFT needle position -
After I turn on the machine -
I have to change the stitch # to #01 for the CENTER needle position -
It’s not hard - it’s just annoying - ;))
===
EDIT UPDATE - 12/20/15 -
I found - on page 11 of the Operation Manual -
"Changing the initial needle position" instructions which state -
(1) Turn off the sewing machine
(2) Hold down the "+" side of the (graphic) (stitch selection key) on the left and turn on the sewing machine.
The initial needle position changes to the center needle position.
NOTE TO SELF -
Review the manual occasionally - you may have missed something - ;))
===
A couple of things that are not "bad" -
Just "different" than my Husqvarna/Viking Lily 555 - are -
It has a Vertical spool holder -
My Lily 555 has a Horizontal spool holder -
But the top thread guide may make it easier to use my Cone Thread Holder -
The presser foot lever is on the inside RIGHT side - not the back -
But I use my RIGHT hand to reach through to raise the presser foot anyway -
So that is a minor adjustment for me -
EDIT UPDATE - 12/23/12 -
CAUTION!! Do not accidentally hit the foot pedal-
When you are trying to raise the presser foot lever -
Your thumb may get caught between the needle bar thread guide -
And the presser foot lever - ask me how I know - ;))
The thread cutter is on LEFT side - not the back -
So I have to get used to pulling the fabric FORWARD -
And then cutting the thread off the LEFT side -
The bobbins are a different type - of course -
They are a clear plastic - not metal - or green plastic -
So that makes three kinds of bobbins in my collection now - ;))
How I use it to Sew a 1/4” Seam -
There are three ways to sew a 1/4” seam on this machine -
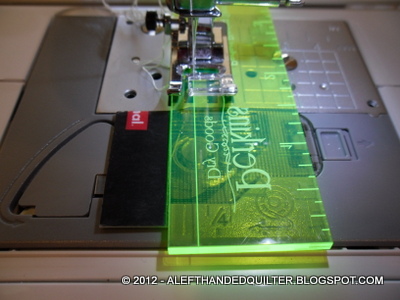
#1 - 1/4” foot -
Her 1/4” inch foot works really well -
Straight stitch - single hole foot -
Center needle position -
My HST came out at 2-1/2” like it was supposed to -
And my two little pieces cut 1-1/2” x 2-1/2” -
Came out at 2-1/2” square - YAY!! -
#2 - Stitch #43 - RIGHT side -
Zigzag foot "J" -
I lined up my little guide with the Seam Guide ruler -
I stitched two strips - 1-1/2” wide -
And it came out at 2-1/2” - Right on!! -
#3 - Stitch #44 - LEFT side -
Zigzag foot "J" -
I did the same thing using the other stitch -
I lined up my little guide with the Seam Guide ruler on the LEFT side -
I stitched two strips - 1-1/2” wide -
It was a bit weird lining up the fabric on the LEFT -
But it came out at 2-1/2” - Right on!! -
How I use it to sew some Sample Stitches -
Alphabet font sample -
I drew lines on some blue fabric about 1/2” apart -
And used a coffee filter as a stabilizer -
The top three lines are the three fonts on my Husqvarna/Viking Lily 555 -
The bottom line is the Brother SQ9050 -
With the Lily - I simply push the button with the letter I want/need -
With the SQ9050 - I have to push two stitch selection keys to enter the number of the stitch -
So it’s a bit more time consuming -
But I actually like the looks of the SQ9050 letters better -
“Stipple stitch” - Stitch #49 -
The one in the middle - I was fiddling with the stitch width and length -
But the ones on the left and on the right are at the default settings -
“Lazy Daisy stitch” - Stitch #27 -
“Loopy” decorative stitch - Stitch #75 -
Quilting sample -
I did a little FMQ - Leah Day style -
With my “broken” FMQ spring foot and the feed dogs UP - here -
Not bad - but I need more PRACTICE!! - ;))
Summary -
I have only had this machine for a very short time -
And I have just scratched the surface in terms of what she can do -
And I have some more testing/playing to do yet -
And some reviews have said that she develops tension problems about six months down the road - so we’ll have to wait and see about that -
But -
From what I have seen/done so far -
What it can do -
And - especially - for the PRICE -
I think that it’s quite a cool little sewing machine!! - ;))
Would I recommend this sewing machine?
YES
EDIT UPDATE - 8/29/13 -
As I told Miau in the comments below -
YES - she still does a good job!! - ;)) I use her mostly to do my piecing - and use Method #2 described above - Stitch #43 with the zig-zag presser foot "J" - and my stitch guide. Her tension messed up on me ONCE - I simply turned her OFF for a second - then turned her back on - sort of like re-booting your computer. When I turned her back on - all of the tension settings had re-set to the defaults - and she was fine - ;)) Would I still recommend this machine? - YES!! - ;))
EDIT UPDATE - 11/6/13 -
Today I was having some tension issues - loops were showing on the back of the fabric. I turned her off - re-threaded both the top thread and the bobbin - turned her back on - and she was back to normal - ;))
Talk to you later - gotta go - gotta sew -
LEFT-HANDED QUILTING - Review - ShortCut™
============
Note - these instructions are written in LEFTISH.
If you are right-handed - just reverse the directions.
============
Today I want to show you a REALLY cool little ruler -
That Left-Handed Quilters can use - hassle-free - ;))
My kind of ruler!! ;))
But first -
Disclaimer -
I am in no way affiliated with the manufacturer or supplier of this product - to my knowledge.
I did not get this product for FREE in exchange for a review - aka barter. I paid for it.
I have no intention of slandering or libeling anyone or any product.
I am simply stating my opinions - I could be wrong - you may disagree.
My opinions are based on my experience with this product - your results may vary.
I think that about covers it - if I missed something - let me know.
I am not a lawyer - and I am just trying to cover my a$$. ;)).
===
I’ve talked about and shown this ruler before - here -
But I don’t think that I ever actually did a REVIEW -
So here it is -
Mine is called the
SHORT CUT (TM)
Made by June Tailor, Inc.
http://www.junetailor.com/index.htm
Now it’s called a Shape Cut (TM) -
So that’s how OLD mine is!! ;))
Description -
Mine is 12” x 12” -
With slots every 1/2” for cutting
Where you can get it -
You should check your Local Quilt Shop and your favorite suppliers -
As prices do vary - and some items may be on sale - or not - ;))
June Tailor - here -
Some other sites that may or may not have stuff are -
JoAnn
Nancy's Notions
Clotilde
What I LIKE about this ruler -
The LARGE easy-to-read numbers around the edges -
The fact that the numbers read 0-1-2-3-4-5-6 from LEFT to RIGHT -
And from BOTTOM to TOP
What I DON’T like about this ruler -
Nothing comes to mind - ;))
How I use it to cut my sashings -
Layout to cut sashings -
0 - 12 from left to right -
The sashing strips will be cut - 1-1/2” x 6-1/2”
I put a little bit of purple highlighter tape -
On the slots every 1-1/2” -
1-1/2 - 3 - 4-1/2 - 6 - 7-1/2 - 9 - 10-1/2 - and 12
Because I have cut in the wrong slot on occasion -
And the visual reminder helps with that - ;))
I line up a heavy HORIZONTAL - CROSS line with the edge of the fabric -
And a line on my cutting mat -
I line up the VERTICAL slots with the lines on my cutting mat -
The “teardrop” cut-out should be centered over the corners of the markings -
The “teardrop” shape allows for my rotary cutter to “engage” -
I use the blue Dritz kind that is “pressure-sensitive” -
As a Lefty -
I usually measure and rotary cut from RIGHT to LEFT -
But - after I straightened the edge at the "0" slot -
The FIRST strip is just easier for me to cut at the 6-1/2” mark -
Than it is to do the math - to figure out which slot to use -
If I were to count from the right side -
Yeah - even I avoid math sometimes - ;))
Now to sub-cut that strip into 1-1/2” strips -
Turn the strip so that it goes sideways -
And - starting at the RIGHT end -
Cut in each of the marked slots -
Including the last slot to trim the RIGHT edge -
Slick - huh?
And - yeah - they DO measure 1-1/2” x 6-1/2”
Would I recommend this ruler to other Left-Handed Quilters?
YES
Talk to you later - gotta go - gotta sew -
LEFT-HANDED QUILTING - Review - O'LIPFA® Lip Edge Ruler - 5"x24"
============
Note - these instructions are written in LEFTISH.
If you are right-handed - just reverse the directions.
============
Today I want to show you a REALLY cool little ruler -
That Left-Handed Quilters can use - hassle-free - ;))
My kind of ruler!! ;))
But first -
Disclaimer -
I am in no way affiliated with the manufacturer or supplier of this product - to my knowledge.
I did not get this product for FREE in exchange for a review - aka barter. I paid for it.
I have no intention of slandering or libeling anyone or any product.
I am simply stating my opinions - I could be wrong - you may disagree.
My opinions are based on my experience with this product - your results may vary.
I think that about covers it - if I missed something - let me know.
I am not a lawyer - and I am just trying to cover my a$$. ;)).
===
I use this particular ruler quite often -
But I haven’t done a proper REVIEW yet -
It is a VERY handy ruler -

It’s called the -
O’LIPFA® LIP EDGE RULER
Model 11111 - 5” x 24”
Made by O’Lipfa - www.olipfa.com
Made in the USA
It comes in an 18" length -
But I personally prefer the longer - 24" - one -
Just my personal preference - ;))
Description -
The bottom of the ruler has two sets of numbers -
I use the bottom row - 1 - 2 - 3 - 4 - 5
And sometimes put stickers on the other numbers -
To cover them up - if they get in my way - ;))
The lines are easy to see -
Solid lines on the half-inch marks -
Thinner solid lines on the quarter-inch marks -
And dashes on the eighth-inch marks -
NOTE - this is similar to the Omnigrid -
But somehow - not nearly as “cluttered” to me -
Just my opinion - I could be wrong - ;))
Where you can get it -
You should check your Local Quilt Shop and your favorite suppliers -
As prices do vary - and some items may be on sale - or not - ;))
Or you can check Amazon - here -
Some other sites that may or may not have stuff are -
JoAnn
Nancy's Notions
Clotilde
What I LIKE about this ruler -
I like that it has a lip at the top edge -
That hooks on the end of the cutting mat -
Kinda like a “T-square” -
Line up the ruler markings with the mat -
And it won’t slip -

What I DON’T like about this ruler -
Nothing comes to mind - ;))
How I use it to Straighten an edge -
Fold the fabric with the bulk of it to the LEFT -
Line up the ruler -
Hooking the lip edge -
And cut along the LEFT edge -
How I use it to cut a 45-degree diagonal -
At the bottom of the ruler -
It has markings for 45-degree lines -
And 60-degree lines -
Going in BOTH directions -
We LEFTIES can use the ones -
That go from the BOTTOM LEFT CORNER -
To the TOP RIGHT -
To use the 45-degree line -
Starting at the RIGHT end of your strip -
Line up the bottom of your strip -
Along the 45-degree line of the ruler -
And cut along the LEFT side -
Same goes for the 60-degree line -
Just use the 60-degree line - ;))
Would I recommend this ruler to another Left-Handed Quilter?
YES
Talk to you later - gotta go - gotta sew -
P.S. BOB has a fun idea - check it out - here - ;))
Ever since my Iron died - here -
I have been looking for a backup -
For her replacement -
IRON MAN I -
Proctor Silex
Easy Press (TM)
Retractable Cord Iron
NO AUTO SHUT-OFF
Right-handed cord
I think that I got it at Target -
For less than $30 -
Way back when -
These cost some serious $$$ -
- Velocity V50 - here -
Bypass Auto Shut-Off -
$99
- Reliable Corporation Digital Velocity Iron - V100 - here -
$139
- ROWENTA DX8900 - here -
Professional Iron With No Auto Shut-Off
Pricing not available
- Rowenta Expert Pressure Iron and Steamer - here -
$299.99
I looked at JoAnn - here -
I looked at Nancy’s Notions - here -
I looked at too many places to name them all -
I was having trouble finding what I wanted -
I wanted what most of them didn’t have -
I want/wanted one with NO AUTO SHUT-OFF -
I know that there are those out there -
Who LOVE the safety feature -
And I understand why the feature is there -
So no comments - please -
I am just NOT one of those people - ;))
I do not forget to turn my iron off -
I do not forget to turn my stove off -
I do not have cats - or children -
To knock my iron over -
I am a grown-up -
And perfectly capable of remembering -
To turn my Iron OFF -
When I am done using it - ;))
And I HATE to be sewing -
Turn around to press something -
Only to find that the dang thing -
Has turned itself OFF -
I can do that -
I know how - ;))
SO -
I was having trouble finding an iron -
With NO AUTO SHUT-OFF -
Unless I wanted to spend a small fortune** -
And I didn't want to - ;))
So I settled for -
IRON MAN II -
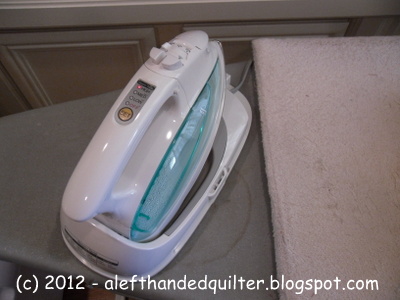
Panasonic Steam Iron with Micro-Mist Spray NI - L70SR - here -
Electric Cordless Steam Iron
Auto Shut-Off
Retractable Cord Iron
$55.99
I talked myself into it -
Even though it cost more -
Than I wanted to pay -
And was NOT Auto Shut-Off -
Because it is cordless -
And the cord is retractable -
But I didn't realize -
Until I got it -
That the cord is RIGHT-HANDED on the base -
What is interesting -
Is that the release button -
For the detachable water tank -
Is in the perfect spot -
To press it with my LEFT thumb - ;))
So I got it all set up -
AND THEN -
Quilty Mama - here -
Sent me this link - here -
PERFECT!!
IRON MAN III -
Continental Electric CP43001 Classic Dry Iron
They are available online from Home Depot -
For about $30 -
But I found one on Amazon - here -
New: From $19.99
Electronics Warehouse Outlet
$20 plus shipping -
Still cheaper than Home Depot -
And WAY less $$$ than the others -
What a deal!! ;))
NO AUTO SHUT-OFF -
No holes -
A cord that comes from the CENTER of the iron -
Not the RIGHT -
It is a DRY iron -
So it has NO HOLES -
To snag your fabric -
OR to release steam -
Like when I was a kid -
If you want to press yardage -
Spritz it with a spray bottle of water -
Or take it out of the dryer early -
And press it while it is still damp - ;))
Here’s a side-by-side comparison -
It’s not a HUGE iron -
But it is HEAVY -
And it is -
EXACTLY -
What I wanted!! -
Thanks, Quilty Mama!! -
And Bonnie!!
Talk to you later - gotta go - gotta sew -
**BOB says - GREAT!! - I have to pay EXTRA for you to leave OFF a feature!!
That makes sense - ;))