============
Note - these instructions are written in LEFTISH.
If you are right-handed - just reverse the directions.
============
As part of the documentation of my quilts -
I like to make a Scrap Card -
I showed you my process - here -
But basically -
I cut a strip/piece of each fabric -
That I use in a quilt -
And stitch it to an index card -
Like this -
Trim it all up -
And add it to my scrapbook - ;))
AND -
I make a Foundation Paper Pieced Heart -
I showed you the long version - here -
But - while I’m at it -
I thought my new readers might like to see -
A short version of -
How I Do It - ;))
I want my Wolf to take center stage on this heart -
So I sorted through my heart shapes -
And found the one I want -
I want my Wolf to go here -

And - because I do it BACKWARDS -
From the way most people do it -
I can put him here -
And KNOW that he will be there -
When he gets sewn -
And NOT be reversed!!
Yay for MY WAY!!
I just fold the pattern on the line -
And trim 1/4” past the fold -
That’s where he will be when I’m done -
For the left side of the heart -
I ignored the lines on the pattern -
And sewed a sample of each fabric used in the quilt -
Checking it against the pattern to make sure it fit the space -
And straightened the RIGHT edge -
Place it next to my Wolf -
Should be just fine -
Remove the pattern - temporarily -
Put the Wolf and the strip set -
Right sides together -
Baste the seam - to see if I like it -
Don’t want to have to “unsew” itty bitty stitches -
Don’t like it -
The Wolf is too low -
Do over -
Much better - ;))
Normally -
The sections would be sewn to the TOP of the paper pattern -
But - in this case -
I just used the paper pattern as a placement guide for the pieces -
SO -
I need to pin the Wolf section - to the TOP of the paper pattern -
For the rest of my “process” - ;))
Then -
Place the Wolf section - RIGHT SIDE DOWN -
On a piece of muslin -
Starting on a straight part of the side -
Sew completely around the heart -
Using a tiny stitch -
Trim it - 1/8”-1/4” away from the stitching -
Clip the “V” and the point -
Remove the paper - carefully -
Clip the muslin - being careful NOT to clip the Wolf -
Turn it inside out -
And -
Viola! -
A Heart and Scrap Card -
For my scrapbook - ;))
Talk to you later - gotta go - gotta sew -
DESIGN WALL MONDAY -
Check out all of us who link up with Judy L. at Patchwork Times on Mondays.
We have some awesome stuff on our walls!
Well, THEY do - ME - not so much sometimes - ;))
============
Note - these instructions are written in LEFTISH.
If you are right-handed - just reverse the directions.
============
I took another break –
From my LHQ Sampler Quilt -
See the page/tab at the top of my blog -
I decided to finish the backing for the Wolf Song quilt –
I started working on it a while back -
But I got sidetracked - ;))
The panel came with two more wolf scenes –
Perfect for the back –
Add some brown trees for a strip in the middle -
Add some green trees and the extra wolf vignette fabric –
For a strip along the top –
Then fill in with some black along the bottom -
Looking good!! –
And then -
I saw another squirrel - :))
And never got back to it -
Until now -
So -
One problem is that my first plan doesn’t fit this wall -
It's too big -
So I switched to the wall in the hallway -
And - because I have a tendency to measure WRONG -
I put up the top first -
Now - if I pin the back on top of it -
With some extra on each side -
I can SEE if it’s big enough -
Or not - ;))
The green trees and extra wolf vignette fabric -
At the top -
A chunk of dark green at the bottom -
Gotta save that BLACK - LOVE that BLACK!! -
The wolf scenes can go in the middle -
So they won’t get chopped off when it gets trimmed -
With a spacer strip to set off the wolf vignette fabric -
Sew some more green trees to the left -
And some brown trees to the right -
Shift the big green chunk on the bottom -
Over to the left side -
Add some more green trees to the right side -
NEVER going to use those green trees again -
Might as well use it UP!! -
And when I sew larger pieces together -
I always put an extra pin to keep the sides straight -
See the top pin on the right?
I’m sewing the edge along the bottom -
Close-up of the wolf scenes -
Looking good!!
Here’s another shot from the other end of the hallway -
The whole top is covered -
Looks big enough to me - ;))
Sew it all together -
Put it up on the wall -
Top and back -
Side by side -
Now I need the sleeve - binding - and label -
Then I can pack it up for my friend/quilter -
To quilt -
While I make the scrap card -
Heart -
Write the story -
And gather photos - ;))
Talk to you later – gotta go – gotta sew –
LEFT-HANDED QUILTING - Squaring Up a Panel Print
============
Note - these instructions are written in LEFTISH.
If you are right-handed - just reverse the directions.
============
I was looking though some old photos –
And found some that I had wanted to post –
But couldn’t – at the time –
One set was of the Wolf Panel –
That center square/panel was SO tweaked!!
I thought I would share with you –
How I handled its “tweakiness” –
First – I prewashed it –
To remove the sizing and whatever else was in the fabric -
Second – I pressed it –
Really well –
If it was going to stretch –
I wanted it stretched BEFORE I sewed with it -
Even after all of that -
Do you see how crooked the bottom of the print is?
Trust me - it wasn’t much better at the top -
SO – the question was –
How do you square up a panel print –
That doesn’t want to be square?
This Is How I Did It –
I cut a piece of freezer paper -
The same size as the “cut” square that I needed –
And I centered the freezer paper the best I could –
Over the Wolf’s face –
And then pressed the freezer paper to the panel print –
NOTE –
PLEASE BE SURE to press the freezer paper to the panel print –
ON YOUR IRONING SURFACE –
NOT on your cutting mat - ;))
Trim around the freezer paper -
Peel off the freezer paper -
See –
All nice and square -
NOTE -
I was lucky that the size I needed did NOT include the borders on the panel -
If it had - I would have had to trim them off -
and adjust the next border accordingly.
Add the new side borders first -
Then the top and bottom -
Ta Dah!!
Talk to you later – gotta go – gotta sew -
DESIGN WALL MONDAY – 9/12/11
OK – now I can FINALLY show you the rest of this one -
I made it as a surprise for "My Other Half” aka “Dad” aka “Grandpa” -
So I could only work on it when he was OUT OF THE HOUSE–
I couldn’t very well do it while he was HOME –
Who knows when he would stroll down the hall to see what I was doing –
No- he had to be GONE!!
OUT OF THE HOUSE - GONE!!
The sound of the garage door going up was my signal that he was back HOME –
and that gave me JUST enough time to stash “stuff” before he walked in the door –
One time, though - the sound startled me and I jumped –
Boy – I tell ya - you have NEVER seen me move that FAST!! ;))
Anyway – it’s done now –
Kinda –
It was going to be a Christmas present –
But I gave it to him early –
Just the quilt top – (44 x 56) -
So that he could decide if he wants it larger –
If so - I can always add a border or two –
If I had “finished” it – It would have been too late to change it –
See!! – UFO’s ARE good for something!!
But – he likes it the way it is –
So – I just need to finish up the rest -
Which should be MUCH easier now ‘cuz I can work on it any time I want -
and don’t have to HIDE what I’m doing!!
Besides - now I can show you guys, too!!
Talk to you later – gotta go – gotta sew –
Design Wall Monday – 7/11/11
So this is what is on my design wall today -
Well, kinda/sorta on the wall - (not REALLY on the wall) - yet -
Remember this one??

Yeah – I took some time off to catch up on some other non-quilty things –
And to work on a scrappy project that I will show you later –
But for now - I’m back to this one - AGAIN -
Last time – I said that I needed 32 of these guys –
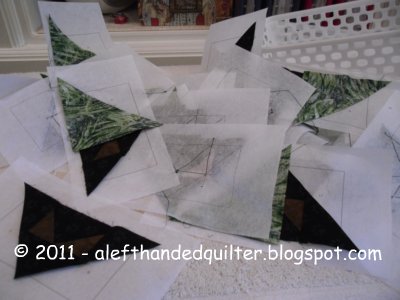
Step one – sew a brown to the right of the green
Line some up
Stitch one - press it – see if it works
Looks good -
green – right side up
brown on top – right side down
just like so
Then – because
I need a visual aid to keep things straight in my Swiss-cheese brain –
And - I only want to invent the wheel ONCE –
And - I don’t want to have to think through the steps EVERY time -
I make one of each
But – even then – I have to PAY ATTENTION!!
Do you see the problem here??
Gotta stitch the “correct” seam, Kitty – the TOP one!! (top seam in the LEFT photo) -
not the OTHER one!! (bottom seam in the RIGHT photo)
So – got it – moving right along -
Got the 32 “middles” done –
And 16 black ends -
And 16 green ends
OK – need some with the green on the left
And some with the green on the right
Let’s try one of these
And one of the other
On the back – you can see the seams go vertically on one set and horizontally on the other – interesting, huh?
Now - if I lay them out –
With the yellow ruler on the left - at the 10-1/2” mark
(they're supposed to be 10-1/2" wide)
Notice anything STRANGE??
Those suckers are both 1/4" short - AGAIN!!!
Say it with me, gang - OH CRAP!!
Where the he!! did my 1/4" go THIS time??
It can't be the cutting – they were Foundation Paper Pieced!!
It HAS to be the seam allowance!!
I KNEW IT!!
DO OVER!! DO OVER!!
GOT IT!!
Now for the other one -
DO THAT ONE OVER, TOO!!
PERFECT!!
ONE MORE THING TO DO -
WRITE IT DOWN!!
ALL OF THE SETTINGS –
NEEDLE SIZE –
FOOT -
STITCH # –
STITCH LENGTH –
STITCH WIDTH -
THREAD –
TENSION –
PRESSURE –
EVERYTHING!!
FOR NEXT TIME!!
I AM SOOOOOOOOOO TIRED OF LOSING AND THEN HAVING TO FIND THAT DAMN 1/4" - NEED TO PUT A BELL ON IT OR SOMETHING!!
Talk to you later – gotta go – gotta sew –
Design Wall Monday - 6/20/11
So here’s what’s on my design wall today –
Well - it's kinda still on the pressing board - but close enough -
Bits and pieces of a new project - Yeah - a new project!
I got tied up last week with trying to finish a bunch of "'other" stuff - NOT sewing stuff!
Yesterday I HAD TO SEW OR GO NUTS!! (More nuts than I already am anyway.)
So - I started working on this -
This block is NOT my original design - it's from a quilt pattern designed by Lucy A. Fazely and Michael L. Burns that appeared in the December 2009 issue of Quilter's World.
I decided to Foundation Paper Piece the blocks - just because - so I worked it out on EQ7®. I LOVE EQ7®
Anyway - I had printed out the foundations last week - and cut out some fabric - and then had set the whole mess aside while I tackled "other" stuff.
So - I was rolling right along - having a great old time -
When - I got to the end - and I was TWO sets short!!
OH CRAP!!
Not AGAIN!!
How did I do that??
I could have sworn I cut 32 of these things - 4 each for 8 blocks - that makes 32 - right?
Two batches of 16 - still 32 - right?
How did I come up short?
Who knows?
So - I dig out the fabrics - AGAIN - and cut TWO more sets.
(Another reason I ALWAYS buy more than I need - I can always put it back in my stash - but I HATE coming up short!)
I get the extra two sets cut - and then guess what?
Yup - sure enough - I FOUND the two missing ones!!
See them peeking out from under my little red tray?
I had put them under the tray so they wouldn't blow away!
Probably would have found them if they had!
Now I have TWO EXTRA SETS - and - now you know how I get my SCRAPS!!
Talk to you later - gotta go - gotta sew -