Note - these instructions are written in LEFTISH.
If you are right-handed - just reverse the directions.
============
More 6” sampler blocks -
That you can make using -
2-1/2” squares -
HST that FINISH at 2” -
Strips - cut 1-1/2” x 2-1/2” -
4-Patches that FINISH at 2" -
And QST that FINISH at 2” -
Three across and three down -
Variations of the basic NINE-PATCH -
The sewn block will MEASURE 6-1/2” -
And FINISH at 6” -
===
This next group of blocks -
Needs a bunch of QST units -
Light/medium -
Light/dark -
Medium/dark -
So I thought that I would use Triangulations -
Like I did - here -
And make a bunch to play with -
Just make sure that you print out the QST ones that will FINISH at 2” -
12 QST squares per page -
24 QST units per page -
Then I pulled a dark - a medium - and a light -
From my stash -
And a couple of sheets of Triangulations -
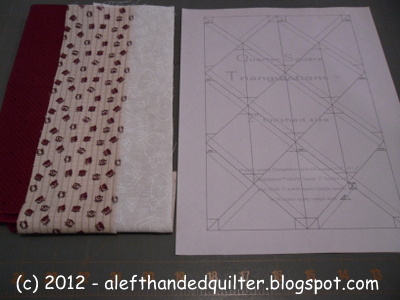
And made these -

On the striped one -
Four were different -
20 went across -
4 went down -

So I went back to the sheet -
To see what happened -
And they all go the same direction -
EXCEPT the two on the top -
And the two on the bottom -
I marked them with an “X” -

Gotta watch that with stripes -
Anyway -
Pressed them all open -
All ready to match up -

Matched them -
AND -
Do see anything wrong?

Top right -
The medium/dark and light/dark is OK -
Bottom left -
The light/medium and light/dark is OK -
But -
Top left -
The medium/dark and the light/medium -
When matched -
Have the medium sides touching -
CRAP!!
But - you wanna know a trick??
If you want one “unit” to switch sides -
Sew it on the OTHER side - ;))
Watch -
I paired two 1-1/2” strips -
A light and a medium -
And - using the Companion Angle -
By Darlene Zimmerman -
Cut a test set -
Lined up the ruler at the 2” line -

Remember what I said -
About the fabric on the TOP -
As you sew it -
Being on the RIGHT side -
When you open it up? -
Take a look at one of the Triangulation sets -
The paper is on the side next to the LIGHT -
And you can see the seam line on the BOTTOM LEFT -
So if you flip it over -
It is actually getting sewn -
With the MEDIUM on top -
So when you open it up -
The MEDIUM is on the RIGHT side -

WHAT IF -
I sewed on the OTHER SIDE of the triangle -
That would switch the side the MEDIUM was on -
Right??

Top row - sew BOTTOM RIGHT side of the triangle -
Bottom row - sew TOP RIGHT side of the triangle -
NOW it will match a medium/dark unit - ;))

Anyway -
I made a bunch the OTHER way -
Pressed them all open -
Matched them up -

And - if I leave the paper on -
Until I get them together -

They come out -
Right ON! - ;))

So -
That should get me started -
But I don't know yet -
Which ones I need to match -
Or what other "puzzle pieces" I need -
So I won't sew any of them together -
Until I get there - ;))
Talk to you later - gotta go - gotta sew -

1 comment:
Different colorways than last time but getting those pieces prepped! How clever of you.
Looking for my companion angle deal---ah, there it is! Right with the Easy Angle II, LOL.
Post a Comment