For those of you who have been patiently following my progress on this monster -
THANKS!! - your encouragement has kept me going - and "on task" -
Except for that one Squirrel the other day - LOL -
And I know that it has taken me a while - because I'm so slow -
But I think you'll like today's post - ;))
===
So to continue the saga -
Today I pinned and sewed the second side seam -

Then trimmed both side seams at 1/2" - before tackling the center seam -

That was a monster - but I found the ends of the two side seams - made them "meet in the middle" - and then pinned out to the fold on the right end -

Then came back and pinned toward the fold on the left end - left a "gap" for turning it inside out - and drew my chalk lines for sewing like I did on the side seams -

Sewed and trimmed again at 1/2" - because I thought 1/4" would be too skinny if I had a problem - and I plan to sew completely around the entire top about 1/2" away from the new "edges" - like on a potholder. It won't need a binding - but if the edges begin to fray - I can always bind it later -

Then it was time to turn it inside out -
And - Oh, crap! -
I was afraid this was going to happen - should have basted it better - but it's too late now - LOL - I just have to cross my fingers that the opening that I left is big enough to get my arm in there if I need to straighten this out later -

Part way through - I had second thoughts -
Oh, dear - what have I gotten myself into? - LOL - ;))

OK - found one corner -
The rest of them are in there somewhere - LOL -

Found the second one -

And then I found the rest of them -
Flattened it out a bit -
And laid it out on the floor -
It's bigger than the floor space -
So the left side is folded over a bit -
But it worked!! -
Ta Dah!! -

The opening is in the lower left corner - and should be easy enough to hide -

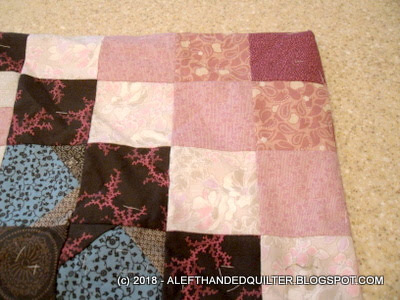
I like how the center on this side came together - totally by accident -

I flipped over one corner to see what the other side looked like -
But couldn't really tell -

So I flipped the whole thing over to see the other side -
And again - the left side is folded over a bit because it's so big -
But I LIKE IT!! -

Tomorrow I'll mess with flattening it out - checking that the batting isn't scrunched up or folded anywhere - give it a good pressing to "fuse" the batting where it should be - and stabilize it for quilting - then play with hiding that opening - and removing the basting thread - ;))
To refresh your memory -
This is what it looked like BEFORE I started messing with it -
King-size plus -
WAAAAAAY too big to quilt by myself -
OR send out to be professionally quilted -

Now it's about half the size - two-sided - and a much more manageable size -
I sure wish I could remember where I saw this technique in the first place - so I could give the person credit. Somebody somewhere thought of it first - and it wasn't me. I just tried to recreate something I thought I remembered. I've been quilting for over forty years and have hundreds if not thousands of books and magazines that I have read from cover to cover. I have not been able to find the source of this particular technique yet. It's not like somebody showed me how to do it yesterday. It's something I saw a long time ago and tucked away in my brain until I "needed" it. I looked through some of my older books and spent some time these past few days searching the internet but still haven't found it.
Anyway - THANK YOU!! - whoever you are - it's an awesome technique that I will surely use again - ;))
And I already know how I'm going to quilt it. I have a favorite "pattern" that I've used several times on older quilts. I think you'll like it - so stay tuned - ;))
Talk to you later - gotta go - gotta sew -

5 comments:
WOW! Amazing how different the two sides look. I had been following your progress but could not quite wrap my brain around what you are doing but the lightbulb has turned on.
I have a couple of large tops....maybe doing something like this could actually get them finished.
Thank you for sharing.
That is going to be a wonderful two sided quilt. I think I would leave the basting thread until after I got it quilted as an extra protection against batting shift.
I have to laugh at the "oh crap" moment in the middle of turning it. I have those moments way too often.
Well, that went quite nicely! I'll admit, I had my doubts and started to wonder if maybe you'd lost your mind, but it looks great! Not that I'm going to try anything crazy like that any time soon (I might end up with a cat inside mine...knowing how helpful mine can be...and with 5 of then running around, the odds go up...), but it's nice to know it can be done...
I confess I'm not quite sure how this works but the main thing is it did! So good for you and you have beautiful sides to this quilt.
Seems complicated to me but great results!
Post a Comment