Is not my favorite pastime - but sometimes it's necessary -
And I swear - if I had noticed that this layer cake had "pinked" edges -
I would NOT have bought it.
I complained to one of my friends -
I detest "pinked" edges - especially when the outside tip BARELY makes them the size they are supposed to be. I have bypassed buying jelly rolls when I noticed that the edges were "pinked" - they are NOT worth the trouble. I obviously didn't notice that this layer cake was "pinked" - because if I had - I would NOT have bought it - UGH!! My 4-patches are supposed to be 6-1/2" - they BARELY make 6-1/4" - and that 1/4" adds up fast - I'm losing 2-1/4" width-wise and 2-1/2" length-wise on a 9x10 layout. Hopefully I won't have to trim them down to 6" - that's another 1/4" - ;))Anyway - my horoscope said to "Focus on creating solutions rather than complaining about problems." - so I did -
And - yes - I read my horoscope - as entertainment to see if it could apply to my day - and it is usually so generic that it actually does - LOL - ;))
So I tried to figure out how to make the best of what I had - and that meant trimming ALL of the blocks down to get rid of those "pinked" edges -
Then I changed my mind about trimming the "twosies" and trimming them again after I made the 4-patches - why trim them twice? - sewing the 4-patch and trimming it once should work -
And it did -
I like to trim blocks from the back-side so I can line up the seam lines with markings on my rulers - in this case the 3-1/8" mark - both vertically -
(sorry for the blurry shot) -
And horizontally -
Then trimmed UP the LEFT side and ACROSS the TOP -
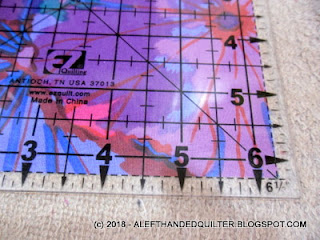
Turned the block around and lined up the newly cut STRAIGHT edges with the bottom right corner on the 6-1/4" marks -
And trimmed again - UP the LEFT side and ACROSS the TOP -
There were only 10 4-patches - so it wasn't that bad to trim them one by one -
Next came the 2-patch blocks -
The way the layer cake is cut for this pattern gives me two piles - mirror images - each with a SHORT STRAIGHT edge along the TOP - and one LONG STRAIGHT edge - on the RIGHT in one pile - and on the LEFT in the other pile - so it was easy to pair them up - flipping the patch on the right over onto the patch on the left - with a STRAIGHT edge on top and along the right side - the stitching side -
I tried to sew a blue/green/purple one to a red/orange one in each set -
Ran those through the sewing machine -
And one "odd-ball" - the extra "twosie" and one rectangle - my version of "I SPY" - one of these is NOT like the others - LOL - ;))
The first 2-patch was trimmed in stages - I wasn't sure of the best way to do it -
but I soon realized that I could trim them in two swipes instead of four -
If I left them folded -
And lined up the STRAIGHT end with the 6-1/4" mark and put the seamline at the 3-1/8" mark on the right side -
And the left side -
Then I could trim UP the LEFT side and ACROSS the TOP - two swipes - and no more "pinked" edges -
These are the trimmings from the 4-patches -
Next up - the "supposed to be" 6-1/2" squares - LOL -
The cutting pattern gives me two STRAIGHT edges and two "pinked" ones -
So I took two at a time and lined up the bottom and right STRAIGHT edges with the 6-1/4" marks -
And trimmed UP the LEFT side and ACROSS the TOP - two swipes - again - to get rid of those "pinked" edges -
Now I have piles of blocks that ALL measure 6-1/4" -
And NO "pinked" edges - ;))
Layout is next -
But I have to clear off the kitchen island first - LOL - ;))
Talk to you later - gotta go - gotta sew -


2 comments:
It looks like your colors are going to be a great mix and very pretty. I am looking forward to seeing the layout on this.
Looking good! And in the end, you'll see the beautiful (or kinda ugly, busy) quilt and forget the troubles. As for horoscopes...yep, generic!
Post a Comment