A blog about quilting and using the LEFT-EZE Rule - my HST/QST Ruler designed for LEFT-HANDED Quilters -
Pages
- Home
- LEFT-EZE™ Rule
- LEFT-EZE™ Rule - Tutorials
- LEFT-EZE™ Rule - Size Chart
- LEFT-EZE™ Rule - Free Pattern & Tutorial
- LEFT-EZE™ Rule - Reviews/Testimonials
- About This Blog - And Me
- Rules
- Reviews
- Quilt Journal
- QJ - Floral Applique
- Sudoku Quilts
- Studio Organization
- Fabric Storage Tips
- Left-Handed Quilting (LHQ) - Introduction
- LHQ - Basics
- LHQ - Rotary Cutting
- LHQ - Construction
- LHQ - Hand Sewing
- LHQ - Binding
- LHQ - Finishing The Quilt
- LHQSQ - LHQ Sampler Quilt
- UFOs/Projects/Squirrels
- Quilt-Along - LHQSQ 2.0
- Privacy Policy
Sunday, March 31, 2019
A little more experimenting -
Cutting some itty bitty 4 Patch Posies -
Using my 1-1/2" square die (1" finished) -
And another set of scraps - ;))
Using the die to cut squares out of the corner sections -
You can see the dots in the lower right corners are not EXACTLY the same cut -
But they go together well enough -
I liked this one the best -
But lost a lot in the seam allowances -
So I tried it again -
This time - a MUCH better cut -
Once again losing a bunch in the seam allowance -
But it was a MUCH closer match -
And the whole thing is only 2-1/2" square -
So we're talking itty bitty - LOL - ;))
So I thought - THIS time I need to take photos of HOW I did it -
I started with pin point matches in two places on all four scraps -
Pulled the pins all the way through and turned the set upside down -
MATCHING them with my fingers as I put them down on the ironing mat -
Then- with a "temporary" fabric glue stick - I put a small dab of glue on the first scrap on the bottom - on the back side of the fabric because it was upside down - and AWAY from where the die blades would be - finger pressed the second scrap down on top of the glue - making sure it was still lined up properly - then put a small dab of glue on the second scrap - finger pressed the third scrap down on top of the glue - and added another dab of glue on the third scrap - finger pressed the fourth/top scrap down -
When all four layers were glued together - and I was sure they were still lined up with the pin - I pinned the fabric together - taking the smallest bite of the fabric and smoothing it out -
Then went to the other end of the scrap and did the "glue-thing" on that side -
Starting with the bottom scrap -
After all four layers were temporarily glued together -
Out of range of the die blades -
And out of range of the actual SQUARES that will be cut -
I removed the pins and carefully transferred the stack to the die -
And ran it through the die cutter -
Pretty darn close -
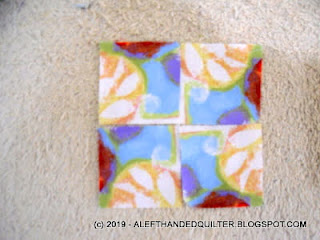
Decided on this layout -
Spun the seam on the back -
And the center is a pretty close match -
AND there is NO glue on the SQUARES themselves - just the die cut-off scraps -
Even IF there was glue on the SQUARES - it's water soluble - so it's not a problem -
So I tried it again - and again - and again -
Getting better each time I tried it -
So I made two itty bitty blocks -
That finish at 4" square -
And put them on the design wall -
Then I finished the quarter plate sections on the rest of the Dresden Plates -
So all they need now is the final layout and the "centers" fused and appliqued down -
It took me a while and some trial and error to perfect my "technique" -
But I made 8 sets of 4 - to make 2 more 4" (finished) blocks -
Each time I made one - it got a little easier -
And a little more "lined up" -
And it was fun! -
I'm not sure if it will work as well on a larger scale -
But I can chase that Squirrel on Sunday - LOL - ;))
Talk to you later - gotta go - gotta sew -
Subscribe to:
Post Comments (Atom)


3 comments:
Love those cute mini squares. It would take a lot of them to make a quilt lol. I can see a small quilt, perfect. Keep experimenting!
I love that you're "going to chase that squirrel on Sunday"...as though you haven't been chasing it all week! But the little blocks are looking good, even if the seam allowances are causing trouble. (And unless someone sees the before, they'll never know what they're missing!) Good luck with continuing with the tiny pieces. But I see some triangle bits left over there...
Using a gluestick to hold them together to go on the die is clever. I hope you tell us that it works on the larger pieces. (I am thinking a few more places will need glued.)
Post a Comment