Worked - YAY!! -
I'm documenting it here for my own personal reference -
In case I decide to do it again -
I won't have to "reinvent the wheel" -
And in case any of you are interested -
===
As you already know -
I prepared a backing large enough for two quilts -
My Upstairs/Downstairs - Christmas Red and Christmas Green -
And then wondered what would happen -
When I got to the end of the second quilt -
And ALL of the bulk was under the throat of the machine -
And I saw that I was in trouble -
In Wednesday's post -
When I finished quilting the first one -
And it looked like I had reached the limit -
As far as throat space was concerned -
The needle was at the edge of the last row -
And the "take-up" roll was right up against the back of the machine -
So I wouldn't be able to quilt complete blocks on the second quilt -
As the "take-up" roll slowly reduced my "workspace" -
So I tried an experiment -
I wanted to take the first quilt off the frame -
Before I quilted the second quilt -
But I didn't want to have to unroll all of the backing from the front rail -
In order to baste another zipper to the top edge -
Since I needed to do that at another machine -
And the backing couldn't be
on the frame when I did it -
I could have pinned a zipper on - but that would have been a pain (for me) -
And I would have done that - as a last resort -
If my experiment didn't work -
But it did! - YAY!! -
===
First -
I rolled the first quilt up on the back rail -
And laid out a zipper to make sure that I had the "correct" half of the zipper -
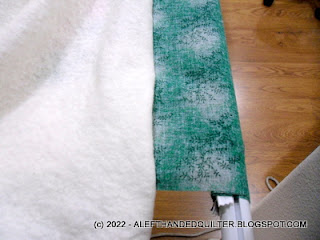
Then I trimmed the batting
off just past the edge of the first quilt -
To "reveal" the backing underneath -
Using a cutting mat between the batting and the backing -
As extra insurance that I wouldn't accidentally cut the backing fabric -
Going around to the back of the frame -
Because I'm left-handed and cut from left to right -
Then I used
my channel lock to baste a zipper to the backing -
BEFORE I cut off the
first quilt -
The channel lock kept the zipper straight -
And I basted the zipper from the center out to the edge on each side -
And as
long as I didn't cut the backing BEFORE the zipper was on it -
I wouldn't
have a backing rolled on the front rail with no zipper -
So AFTER the zipper was basted on -
I cut the backing between the new zipper and the first quilt -
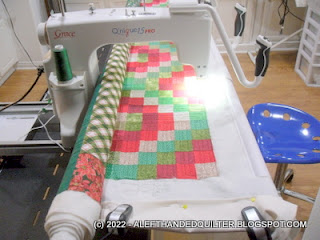
In this photo -
The cut backing with the new zipper is hanging from the top rail -
And the first quilt is rolled up on the bottom rail -
Here's the rolled up first quilt - from the other side of the frame -
Next step - unroll the first quilt from the top rail -
And fan-fold it on the table inserts -
Until I get to the zipper attaching it to the leader cloth -
Unzip the zipper -
Remove the first quilt from the frame -
Fold it up and set it aside -
So that I can unbaste the zipper before I trim the quilt and bind it -
Zip the backing for the second quilt to the leader cloth -
Using the newly basted on zipper -
Check that the center markings line up -
They are not perfect - but they are close enough for me -
Now it looks like it should -
Ready for the second quilt -
And I can pretend that I planned it that way all along - LOL - ;))
Talk to you later - gotta go - gotta sew -


