This last row had a helper -

I decided to try another stencil -
But Buja sat on it -

Then tried to go to sleep on it -


So - needless to say -
It got a little messed up -
And I had to re-do the "pouncing" -
Which I did with a foam brush this time -
Because the "pounce pad" needs a flat surface -
And it's not that easy to get the ruler base in position -
Since I didn't feel like taking it off the frame to "pounce" it -

The lines were clearer this time -
And easier to follow -
I tried to do it in sections - to get nice rounded curves -
But it's not as "smooth" as it could/should be -
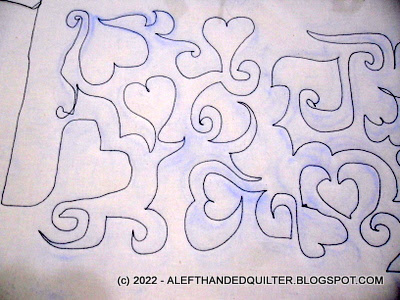

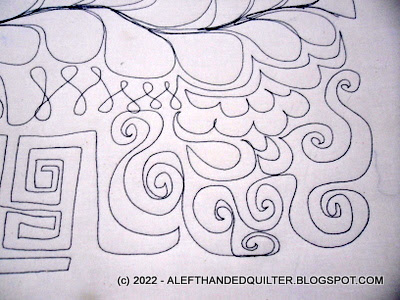
So I did the other side Free-Motion style -
And tried a big feather -
And some other stuff -


Then I played with the tension a little -

And - stitched some more -
Then flipped it up to see the "under" side -
I think the one on the left is the best so far -
So I'll stick with that setting for a while -

Finished that last row -
And took it off the frame -
I may "re-load" it if I want to experiment with something someday -
It has some space around the outside where I can play -

Then I installed the "ruler foot" -
And loaded the Red/White/Blue Panel -
Without the leader cloths -
Which I still don't have -
But which has a MUCH larger backing -
So it's OK -
And it looks pretty straight from here -

I lined it up just inside the left edge of the "workspace" -

But the frame is about a foot short -
So I'll have to "re-hoop" it to get to the other side -
I can see where it will be a tad bit annoying to have to keep
"re-hooping" it -
When the top is more than 36" wide -
I wish they had
something between this 4-1/2 foot frame -
And the 8-1/2 foot "Queen" one -
Something that would
accommodate a 44-45" panel - or a 60" top -
Maybe a 7 footer - 84" - with a workspace of at least 66" -
That would be nice -

Anyway -
I stitched along a seam line or two with the ruler foot -
Then decided that I would "re-hoop" it to stitch some lines in the center -
With the NAVY thread - until I run out of this bobbin -
Then change to RED thread - to outline some red areas -

I should be able to stitch the top half of the large square -
And outline those side squares with the hearts in them -
And then all the way down to the tips of the blue star points -
So I'll practice using the straight ruler -
To outline as many shapes as I can -
And Free- Motion some areas -
Before I have to "re-hoop" it - ;))
Talk to you later - gotta go - gotta sew -

4 comments:
Your practice is showing some improvement. Keep going and you will be quilting all the quilt tops from your closet!
Oooohhhh! A real quilt (okay, preprinted, but still) on the frame! Awesome! Remember to relax and not worry too much. For me, the harder I try, the worse things look. Maybe that's just me, but relaxing at least keeps you from taking a whole bottle of pain meds the next day for all the muscle cramps and aches!
Hitting a marked line is the hardest quilting there is. You have to figure out where you should be looking to follow the design and then be able to change direction when you didn't see that coming. Anything free motion will be smoother curves than following lines. I agree, there should be a size between small and large.
I can see where your practice is paying off. Your helper is adorable.
Post a Comment